|

Building Blocks
Custard
Dried Legumes
Ice Cream
Long-Grain Rice
Omelets
Pancakes
Pasta
Poached Eggs
Soufflés
Stocks
Sauces
Gravy
Hollandaise Sauce
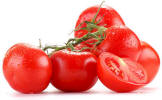
Tomato Sauce
Vinaigrette Sauce
White Sauce
Soups & Stews
Chili
Clam Chowder
Cream Soups
Gazpacho
Side Dishes
Braised Vegetables
Macaroni and Cheese
Mashed Potatoes
Potato Salad
Risotto
Roasted Vegetables
Scalloped Potatoes
Meats
Barbecued Pork
Breaded Cutlets
Chicken Breasts
Fried Chicken
Hamburgers
Kebabs
Leg of Lamb
Lobster
Meatloaf
Pork Chops
Pot Roast
Rib Roast of Beef
Roast Chicken
Salmon Fillets
Shrimp
Stews
Baked Goods
Apple Pie
Biscuits
Chocolate Cake
Choux Pastry
Fruit Cobblers
Pound Cake
Shortcrust Pastry (Pie
Dough)
Yeast Bread
Building
Blocks
Custard
I have put egg custard in the Building Blocks category of my 50
Fundamental Foods because of its incredible versatility. Even though a simple
egg custard all by itself is one of the most delicious things in the world and
is, for that reason alone, something that every serious cook really should
master, it also an essential component in a myriad of dishes, both savory and
sweet.
A basic egg custard forms the foundation of crème brûlée, flan, and crème
caramel, and hundreds of variations on those desserts that are found around the
world. Custard also forms the base for quiche and clafoutis, and is an essential
ingredient in dishes as disparate as English trifle and South African bobotie.
Pumpkin pie, Boston cream pie, Chinese egg tarts, zabaione, and most bread
puddings owe their existence to egg custard.
When thickened with a starch (usually wheat flour but often cornstarch as well),
egg custard is known as pastry cream (crème pâtissière in French) and is the
familiar filling classically used in cream puffs, eclairs, and Napoleons
(mille-feuilles). When made as a thin sauce the consistency of heavy cream, it
is called crème anglaise and is used in floating island, frozen custard,
so-called "French vanilla" ice cream, and as a sauce for fruit, cakes, and pies.
Every classically trained pastry chef in the world carries these recipes around
in their heads at all times - or at least the basic ratios.
Baked Custard
3 cups (750 ml) milk
4 eggs
1/3 cup (80 ml) sugar
1 tsp (5 ml) vanilla extract
1/4 tsp (1 ml) cinnamon
A dash of salt
A grating of fresh nutmeg
Combine all the ingredients except the nutmeg in a mixing bowl and stir with a
whisk just until combined. Vigorous or prolonged mixing will cause air bubbles
to form in the custard. Pour the mixture into a baking dish or individual
custard cups and top each with a grating of fresh nutmeg. Bake in a preheated
300F (150C) for about one hour, until a knife inserted in the center comes out
clean. The custard should still be "jiggly" in the center - it will firm up
after it cools. Serve chilled or at room temperature. Serves 6.
Custard Sauce (Crème Anglaise)
6 egg yolks
1/2 cup (125 ml) sugar
2 cups (500 ml) half-and-half, milk, or combination of the two
2 tsp (10 ml) vanilla extract
Whisk together the yolks and sugar in a small bowl until slightly thickened.
Heat the half-and-half in a saucepan over moderate heat until bubbles form
around the edge of the pan. Whisk about 1/2 cup (125 ml) of the half-and-half
into the egg mixture, then whisk the resulting mixture into the half-and-half.
Reduce the heat under the saucepan to low and stir the sauce constantly with a
rubber spatula or wooden spoon until slightly thickened. Remove the pan from the
heat and continue stirring until the sauce is the consistency of heavy cream,
about 2 minutes. The temperature of the sauce should be about 170F (77C)-it is
very important not to let the sauce get too hot. Stir in the vanilla extract and
strain through a fine sieve if desired. If you plan to serve it cold, let it
cool to room temperature before covering it in order to prevent condensation
from forming. Serve warm or chilled. Makes about 2 cups (500 ml).
Custard Sauce Variations
Chocolate Custard Sauce - Reduce the vanilla in the recipe
above to 1 tsp (5 ml) and add 4 oz (110 g) finely chopped semisweet or
bittersweet chocolate along with the vanilla, stirring until the chocolate is
melted.
Coffee Custard Sauce - Substitute 1 cup (250 ml) strong coffee
for 1 cup of the half-and-half in the recipe above.
Rum Custard Sauce - Substitute 1 to 2 tablespoons (15-30 ml)
dark rum for the vanilla extract in the recipe above.
Liqueur-Flavored Custard Sauce - Substitute 1 to 2 tablespoons
(15-30 ml) Grand Marnier, Kahlua, Drambuie, or liqueur of your choice for the
vanilla extract in the recipe above.
Return to the
Index of Recipes.
Dried Legumes
Dried legumes are among my 50 Fundamental Foods for some very
fundamental reasons. They're enjoyed in every corner of the world, they contain
more protein than any other plant-based food, and they're economical. They
aren't difficult to cook, but there are many myths and old wives' tales
surrounding their cooking, which I'll try to address here.
Dried legumes include all of the things we think of as beans, such as kidney,
navy, lima, soy, garbanzo, and fava beans, as well as peas and lentils. Although
peanuts are also legumes, they are treated very differently by cooks and most of
the following discussion is not applicable to them.
The first matter we need to address when discussing beans is their notorious
gassiness. This is due to the fact that legumes contain carbohydrates that
cannot be digested by humans. These carbohydrates pass through our digestive
systems untouched until they reach the large intestine where bacteria are able
to do what human enzymes can't, producing hydrogen and methane as by products.
There are two proven methods to reduce the amounts of these carbohydrates. The
first is to soak the beans in water for a period of time, and then discard the
water and cook them in fresh water. It is true that this method leaches out some
of the offending carbs, but it also leaches out many other nutrients such as
vitamins, minerals, and antioxidants. The alternate method is long cooking which
breaks down the gas-producing carbohydrates into smaller molecules that we are
able to digest while retaining most of the nutrition provided by the beans.
The reason it takes most beans several hours to cook is because they are
surrounded by seed coat that is very good at locking out moisture. One way to
get around the long cooking is to break or remove the seed coat, as in the case
of split peas and many Indian dals. This isn't practical with many types of
beans, so the only method available is prolonged cooking to hydrate the seed
coat so that water can pass through to the interior of the bean.
Presoaking beans reduces the cooking time by 25% or more, and the time required
to soak the beans depends on temperature. Many recipes recommend soaking beans
for 10 to 12 hours at room temperature, or for about 1 hour in very hot water.
Depending on the type of bean, these two methods usually produce similar
results. Note that the time required to presoak and then cook beans varies
greatly, and is influenced by the type and size of the beans, and even the
weather conditions under which they were grown. Some legumes, especially those
grown under dry conditions, will take longer to rehydrate, while others (i.e.
most lentils) will cook in under an hour with no presoaking required, so be
prepared to test the beans frequently and adjust the cooking time according to
their needs.
Many myths surround the salting of the water that beans are soaked and cooked
in. The truth is that salting the water will greatly reduce the time required to
cook them. Adding 2 teaspoons (10 ml) of salt per quart (liter) of water can
decrease the cooking time by up to 50%, and adding 1 teaspoon (5 ml) of baking
soda can reduce the time required to cook by as much as 75%. In other words,
salt the water during both the presoaking and cooking, add baking soda instead
for even faster cooking. Conversely, adding acidic ingredients (such as tomatoes
or vinegar) or sugar will retard the cooking of the beans, so these ingredients
should always be added towards the end of cooking.
My overseas readers may not fully appreciate how much of a national icon Boston
baked beans are here in the USA. Every American has eaten them hundreds of
times, and many of us think this is the only way to cook beans. I believe this
recipe is doable almost anywhere in the world, even if Great Northern or navy
beans are not available in your neck of the woods. Virtually any small dried
bean will do. Make up a batch of these and keep them on hand, in the
refrigerator, to be reheated whenever you need a last-minute side dish. They are
even good cold, and I know people who love them as a sandwich, between two
slices of buttered bread.
Boston Baked Beans
2 quarts (2 L) water
4 tsp (20 ml) salt
2 lbs (900 g) dried Great Northern, navy, or other small dried bean
1 large onion, peeled, plus 2 large onions, peeled and studded with 2 whole
cloves
3/4 cups (180 ml) dark molasses (treacle)
3/4 cup (180 ml) dark brown sugar
1 Tbs (15 ml) dry mustard
1 tsp (5 ml) freshly ground black pepper
1/2 lb (225 g) salt pork in one piece, with rind left on
Bring 2 qts (2 L) water and 4 tsp (20 ml) salt to a boil in a large pan over
high heat. Add the beans and boil for 2 minutes. Water should cover the beans by
at least 2 inches (5 cm); add more if necessary. Turn off the heat and let the
beans soak for 1 hour. Add the peeled onion and bring to a boil again. Reduce
the heat to low and simmer partially covered for 1 to 2 hours, until the beans
are tender. The water should always cover the beans. Add more water if
necessary. Drain the beans, reserving the liquid, and pick out and discard the
onion. Add more water to the cooking liquid, if necessary, to make 2 quarts (2
L). In a deep bowl mix the molasses, 1/2 cup ( 125 ml) of the brown sugar, the
mustard, pepper, the beans and the reserved cooking liquid and stir gently to
thoroughly combine all the ingredients. Place the clove-studded onions in the
bottom of a 4 to 5 quart (4-5 L) oven-proof baking dish and pour the bean
mixture over them. Score the salt pork by cutting diagonal, crisscrossing slits
about 1/2 inch (1 cm) deep through the fatty side. Push the salt pork into the
beans. Cover the pot tightly and bake in the middle of a 200F (90C) oven for 7
hours. Then remove the lid and sprinkle the remaining 1/4 cup (60 ml) brown
sugar evenly over the top and bake uncovered for an additional hour. Makes about
3 quarts (3 L).
Return to the Index
of Recipes.
Ice Cream
Ice cream is one of the things that everyone needs to make at
least once because, thanks to inexpensive and easy to use ice cream makers that
are available these days, it's easier than you might expect. After you've made
ice cream once, I guarantee you'll make it again.
Although there are hundreds of variations found around the world, ice creams can
be divided into two general categories: those that are custard-based, and those
that aren't. I have included one of each in the recipes below. Dairy products
are generally included, but dairy-free alternatives are available for those who
are lactose intolerant or vegan.
They can be flavored with just about everything under the sun. Worldwide,
vanilla and chocolate are the most popular flavors, but things such as green
tea, avocado, and even garlic flavored ice creams are popular in certain parts
of the world.
Ricotta is a very popular flavor of ice cream in Italy. (Do you think the rum
might have something to do with that?) This recipe can be used as a base for
your own flavor if you add a flavorful mixture of your own design instead of the
ricotta mixture.
Ricotta Ice Cream (Gelato di Ricotta)
1 vanilla bean
2 cups (500 ml) milk
6 egg yolks
3/4 cup (180 ml) sugar
2 cups (500 ml) ricotta cheese
1/4 cup (60 ml) heavy cream
1 Tbs (15 ml) dark rum (optional)
Cut the vanilla bean in half lengthwise and scrape the black paste (the seeds)
from the inside with the tip of a knife. Combine the vanilla seeds, the split
pod, and the milk in a pot and bring to a simmer over moderate heat. Remove from
the heat, let steep for 15 minutes, and remove the vanilla pod. (Place it in a
jar with sugar to make vanilla sugar.) Whisk together the egg yolks and sugar
until fluffy and pale yellow in color. Set aside. Return the milk to the heat
and bring to a simmer again. Remove from the heat and stir about 1/3 of the milk
into the egg mixture. Add the resulting egg yolk mixture to the pan with the
remainder of the milk and stir to combine. Cook over low heat, stirring
constantly, until the mixture thickens slightly or it reaches 185F (85C) on an
instant-read thermometer. Remove from the heat and strain through a fine-mesh
sieve. Cool in the refrigerator, stirring occasionally, until cold to the touch,
about 30 minutes. Combine the ricotta, cream, and optional rum in a bowl and
whisk until smooth and thoroughly combined. Fold the ricotta mixture into the
egg mixture. Transfer to an ice cream maker and freeze according to the
manufacturer's directions. Makes about 1 quart (1 L).
This ice cream is delicate and subtle in flavor. If fresh figs
are not available then use dried figs that have been reconstituted in warm
water. It will make a stronger flavored ice cream, but equally delicious.
Fig Ice Cream
1 lb (450 g) fresh, ripe figs, or dried figs to equal 1 lb. after soaking in
warm water for 2 hours (about 12 to 18 figs, depending on size)
2/3 cup granulated sugar
2 cups milk
Wash the figs and remove the tough tips of the stems. Do not peel the figs. Put
all ingredients in a blender or food processor and process until creamy and
thoroughly combined. Transfer to the tub of an ice cream maker and freeze
according to the manufacturer's instructions. Makes about 6 portions.
Return to the
Index of Recipes.
Long-Grain Rice
I think it's ironic that, even though few things are easier to
cook than rice, it is also one of the foods that many cooks have a great deal of
trouble cooking properly. I have included it in my list of 50 Fundamental Foods
in the hope of banishing forever the notion that rice is a tricky food to cook.
Even though rice is generally divided into three categories (long-, medium-, and
short-grain), the primary subject of this discussion will be long-grain rice.
The medium- and short-grain varieties tend to contain more starch, producing
rice of varying degrees of stickiness, and are typically used in such dishes as
risotto, paella, sushi, and rice pudding, some of which will be dealt with
separately. Long-grain rice is the variety typically served in Chinese and
Indian restaurants, and is what most Americans regard as "regular" rice.
There are two basic methods of cooking long-grain rice: the absorption method in
which the rice absorbs all the water in the cooking pot; and the rapid-boil
method whereby rice is cooked in a large amount of water and drained before
serving. Let's take a look at both methods.
I usually describe the rapid-boil method by saying "cook it like pasta." The
beauty of this method is that it not only works for long-grain rice, but for
every other grain as well. Use the rapid-boil method whenever you want to cook a
perfect batch of brown rice, wild rice, quinoa, barley, spelt, amaranth, farro,
or whatever grain you desire. The only variable in the method is the amount of
time the different grains take to cook, and this is easily monitored by frequent
testing for doneness.
Long-Grain Rice (Rapid-Boil Method)
Bring a pot of water to a brisk boil before adding the rice. You should have at
least 1 quart (1 L) of water per cup of rice. Salt the water if you want to,
keeping in mind that plain rice is never salted in Chinese and most Asian
cuisines. Add the rice and stir immediately to prevent it from sinking to the
bottom of the pot. Lower the heat but maintain a constant boil, and cook,
stirring and testing frequently, until the rice is tender and done to the degree
you prefer. Some people like their rice a little bit firm (as with "al dente"
pasta), but in no case should it take more than 15 to 20 minutes to cook. Drain
in a fine-mesh strainer and serve immediately.
While the rapid-boil method can be used to cook any grains (as well as pasta and
dried beans), the absorption method relies heavily on a fairly precise ratio of
rice to water, and the timing is also critical, so I don't recommend it for
cooking grains other than long-grain rice. Use it to cook other grains only if
you are willing to experiment with the amount of water and the cooking time.
This is the method of cooking long-grain rice that has never failed me.
Long-Grain Rice (Absorption Method)
As a general rule, cook 1/3 to 1/2 cup (80 to 125 ml) raw rice per serving, and
always use a ratio of two parts water (by volume) to one part rice. Bring the
water to a boil in a heavy saucepan and add the rice. Stir once, cover tightly,
and reduce the heat to low. Simmer covered for 15 minutes - do not stir or
remove the lid. Remove from the heat and allow to sit covered for 10 to 15
minutes. Fluff with a fork immediately prior to serving.
Return to the
Index of Recipes.
Omelets
Omelets were added to the list of 50 Fundamental Foods at the
suggestion of a reader, and I was glad to include them for several reasons.
They're easy to make, they're as versatile a food as you'll find anywhere, and
they are something that you will find, in one form or another, in every culinary
culture on the planet. In other words, everyone loves a good omelet.
One of my earliest food memories is of my grandmother making me a jelly omelet
when I was five or six years old. She beat some eggs, put them in a skillet, and
when they had cooked to the point where the top had just barely solidified, she
added a couple of teaspoons of grape jelly before folding the omelet in half and
serving it to me piping hot.
Among the many virtues of omelets is that they happily accept just about any
leftovers you have on hand, so small pieces of leftover meats, vegetables,
potatoes, cheeses, or even pasta can be elevated to lofty heights by adding them
to what is essentially a skillet of scrambled eggs.
Styles of omelets range from the rustic open-faced omelets such as the Italian
frittata and the Spanish tortilla, to the elegant and sophisticated classic
French omelet, a sublime creation of creamy eggs that is traditionally rolled or
folded to surround the additions inside. I have included a recipe from both
traditions.
This recipe demonstrates the basic technique for making a folded omelet. Keep in
mind that the filling can include just about anything that suits your fancy.
Brie and Pancetta Omelet
2-3 eggs
1 Tbs (15 ml) water
Salt and freshly ground pepper to taste
2 slices pancetta or smoked bacon, chopped
1/4 cup (60 ml) Brie, cut into small pieces
Whisk the eggs, water, salt, and pepper together in a small bowl. Saute the
pancetta in an 8-inch non-stick omelet pan or skillet over moderate heat until
crisp. Remove all but about 2 teaspoons (10 ml) of the fat if necessary. Add the
egg mixture and cook without stirring until the edges start to cook, about 30
seconds. Gently lift the edges of the omelet with a spatula, tilting the pan to
allow the uncooked egg mixture to flow underneath. Continue this procedure until
the top is almost dry, about 3 to 4 minutes. Sprinkle the brie over the omelet
and fold in half. Slide the omelet out of the pan onto a plate and serve
immediately. Serves 1.
This omelet, which many Spaniards consider their national dish,
is traditionally served in wedges, right out of the skillet it was cooked in. It
is also eaten at room temperature, and is a popular picnic fare, eaten between
slices of bread sandwich-style.
Spanish Potato Omelet (Tortilla de Patatas)
2 Tbs (30 ml) olive oil
1 medium-sized onion, thinly sliced
3 medium-sized potatoes (1 lb, 450 g) peeled and
cut into 1/8 in (5 mm) slices
Salt and freshly ground black pepper to taste
4 eggs
Heat the olive oil in a skillet (preferably one with a non-stick surface) and
cook the onions and potatoes over moderate heat, tossing occasionally, until
they have colored lightly. Cover the skillet and cook over low heat for 12 to 15
minutes, or until the potatoes are tender. In a small bowl beat the egg with the
salt and pepper until frothy. Pour into the skillet and cook uncovered for 3 to
5 minutes, until the eggs are set on the bottom. Place an inverted plate over
the skillet and, grasping plate and skillet firmly together, turn them over,
transferring the omelet to the plate. Add an additional tablespoon (15 ml) of
oil to the skillet if necessary, then slide the omelet back into the skillet,
browned side up. Cook over moderate heat for an additional 3 to 5 minutes. Serve
warm or at room temperature. Serves 4.
Return to the
Index of Recipes.
Pancakes
Pancakes are about as universal a food as there is. Every culture
on Earth has a pancake of one kind or another in its culinary tool kit, and
archaeological evidence tells us that this has been true for many thousands of
years.
Pancakes can be cooked thick or thin, large or small, and from every type of
flour imaginable. They can be sweet or savory, topped or filled with just about
anything, or eaten all by themselves. Depending on where you live in the world,
pancakes might be an occasional treat or an everyday staple, and they clearly
deserve a place in my list of 50 Fundamental Foods.
One of the world's most-loved versions of the pancake is the thin version that
goes by many names in many places. Here we're going to call them ...
Crêpes
1 cup (250 ml) all-purpose flour
2 eggs
1 cup (250 ml) milk
1/4 tsp (1 ml) salt
Butter for frying
Combine the flour, eggs, milk, and salt in an electric blender and process until
smooth. Refrigerate for 1 hour. Melt a small amount of butter in a crêpe pan or
8-inch (20 cm) non-stick skillet over moderate heat. Pour in just enough batter
to coat the bottom of the pan and cook on both sides until light golden brown.
Turn onto a plate and repeat to make the remaining crêpes. Makes about 8 crêpes.
This is just one of the many ways that crêpes can be turned into
something more than ordinary pancakes.
Blueberry Blintzes
For the filling:
1 1/2 cups (375 ml) cottage cheese or ricotta
1 cup (250 ml) fresh or thawed frozen blueberries (reserve about 1/4 cup (60 ml)
for garnish)
2 Tbs (30 ml) bread crumbs
2 Tbs (30 ml) sugar
1 egg, beaten
1 tsp (5 ml) cinnamon
1 recipe crêpes (see above)
Powdered (confectioner's) sugar for garnish, optional
Combine the filling ingredients and stir to mix thoroughly. Place a spoonful on
each crêpe, fold the ends towards the center and roll up like a burrito. Melt a
little butter in a saute pan and saute the blintzes until golden on both sides.
Garnish with reserved blueberries and powdered sugar if desired. Serves 6 to 8.
Return to the
Index of Recipes.
Pasta
There are more myths about cooking pasta than perhaps any other
kitchen endeavor; adding oil to the water will not keep the pasta from sticking
if you don't cook it right; both under-cooked and over-cooked pasta will stick
to the wall if properly thrown; and adding the salt to the water immediately
before adding the pasta is completely devoid of scientific reasoning. Following
my recipe below will deliver perfect results every time.
But first a word about dried pasta. Buy only pasta that is made
from 100 percent durum wheat, also known as semolina. There was a time when only
pasta imported from Italy could be relied upon to be pure semolina pasta, but
that has changed. In fact, much of the pasta made in Italy today is made from
durum wheat grown in South Dakota, so let price be your guide - American brands
frequently win in blind taste tests.
How to Cook Dried Pasta
One pound (450 g) of dried pasta will serve four people as a main
course, and six to eight as a first course. Boil at least 4 quarts (4 L) of
water per pound of pasta in a very large pot over high heat. A large volume of
water is necessary in order that the water return to the boil as fast as
possible after adding the pasta, so don't try to use less. Add 1 to 2
tablespoons (15 - 30 ml) of salt to the water. This seems like a lot, but most
of the salt goes down the drain with the water. Add salt unless you are on a
strict salt-restricted diet because unsalted pasta tastes bland. Stir the pasta
immediately and let the water return to a boil. (You may cover the pot at this
point in order to help the water heat faster.) Once the water has returned to
the boil, remove the cover and stir the pasta every 2 to 3 minutes, more
frequently at the beginning than towards the end of the cooking. Lower the heat
but make sure the water never stops boiling vigorously; this helps to keep the
pasta in motion and prevents it from sinking to the bottom of the pot and
sticking together. Use the cooking time on the package as a guideline only -
actual cooking times will vary. Test the pasta by tasting a piece. It should be
tender but still firm to the tooth (al dente). I also judge the doneness of my
pasta by the color - as it cooks it changes color from a light yellow to a pale
ivory color, but the only sure method is tasting. Drain the pasta quickly but
not completely and place it in a warm serving bowl - a little of the cooking
liquid will help it remain tender and prevent it from sticking. Sauce the pasta
and serve immediately.
Fresh pasta and commercial dried pasta are two very different
things. While dried pasta is traditionally made with only two ingredients
(semolina made from durum wheat, and water), fresh pasta is usually made from
regular soft wheat flour ("all-purpose" in the U.S.) with eggs serving as the
source of moisture. The following recipe requires a pasta machine for kneading,
rolling, and cutting the pasta. They can be bought for about $40 in any gourmet
shop or department store, and the investment will return a lifetime of fresh
pasta. Please insist on the type with rollers, as the extruder types don't knead
the dough and produce an inferior product.
Basic Recipe for Fresh Pasta
2 1/2 cups (625 ml) all-purpose flour
3 large eggs
2 tsp (10 ml) olive oil
Place the flour in a large mixing bowl or on a flat work surface
and form a well in the center. Beat the eggs and oil together and pour into the
well. Using a fork, begin mixing the flour and egg mixture in the center of the
well, gradually working towards the outside of the mound of flour as the
ingredients are combined. When the mixture becomes too stiff to work with the
fork, begin incorporating the ingredients with your hands until a ball of dough
is formed. The dough should be firm enough to handle and not sticky. Adjust the
consistency with additional flour or a few drops of water if necessary.
Alternately, the ingredients may be combined in an electric food processor and
processed until a ball is formed. Knead the dough by running it through the
pasta machine set on its widest setting six or seven times, folding the dough in
thirds after each pass and dusting lightly with flour if the dough becomes
sticky. After kneading the dough should be firm and have the texture of smooth
leather. Wrap the dough in plastic wrap and let it rest for 30 minutes to 3
hours.
To make noodles, cut the dough into 6 pieces and roll through the
pasta machine set on the widest setting several more times, folding in thirds
and dusting lightly with flour if needed to prevent sticking, then begin
decreasing the width by one notch with each successive pass through the machine
until the dough has reached the desired thickness. Most noodles require the
thinnest setting, but thicker noodles such as spaghetti and pappardelle require
only the next-to-last setting on the machine. Let the dough dry for about 15
minutes and then pass through the cutting mechanism on your machine, or cut by
hand. The cut noodles may be cooked immediately, or may be frozen or dried and
stored for several weeks in an airtight container. To dry, roll the noodles
gently into small "nests" or simply allow to dry flat.
To cook, boil at least 4 quarts (4 L) of salted water for this
recipe. Add the pasta to the boiling water and stir gently. Fresh pasta, even
when dried, cooks much faster than commercial dried pasta. Depending on the
thickness of the noodles, the pasta will be done in as little as 5 seconds, and
in no case should it take longer than 1 minute to cook after the water has
returned to the boil. Test the pasta frequently and drain it in a large colander
as soon as it is tender but still firm. Makes about 1 lb (500 g) to serve 4 to
6.
Return to the
Index of Recipes.
Poached Eggs
Eggs have appeared in several forms already on my list of 50
Fundamental Foods. Omelets, custard, and soufflés have already been covered, and
now we add poached eggs to the list. They are easy to cook, yet many cooks find
them intimidating. Added virtues include their versatility and the degree of
sophistication they add to every dish they appear in.
The perfect poached egg is cooked to the point where the white of the egg is
cooked completely while the yolk remains runny and warm. The secret is in the
poaching, and a little bit of practice will have you making perfect poached eggs
in no time.
The basic technique involves gently lowering a raw egg into a liquid that is
simmering but not boiling. The liquid should be just on the verge of boiling,
and the easiest and most reliable way to achieve this rather precise temperature
is to bring the liquid to a boil and then reduce the heat until the water stops
bubbling. Now you have a simmering liquid. The liquid is salted water more often
than not, but eggs can also be poached in wine, tomato juice, or even a thin
sauce such as enchilada sauce.
Lowering the egg into the simmering liquid as gently as possible is the only
tricky part about poaching eggs. Any small bowl can be used to transfer the raw
egg to the simmering liquid, but I like to use an old-fashioned tea cup because
the handle allows me to get down close to the surface of the liquid without
burning my fingers.
The egg will only take about 3 to 5 minutes to cook to the correct degree, but
this is where the practice comes in. Be prepared to experiment with a few
sacrificial eggs to determine the amount of time that produces results to your
liking. Just remember that the white should be completely cooked, and the yolk
should still be runny.
Most authorities recommend putting a little vinegar in the poaching water
because it helps solidify the whites and prevent ragged edges. I recommend you
do this only if you want your eggs to taste like vinegar, and I have never been
able to detect a difference in the appearance of eggs that have been cooked in
this manner.
If you are looking for a restaurant-quality appearance for your poached eggs, I
suggest you use the method used by restaurants. Poach the eggs as I have
described and then transfer them to a dish towel with a slotted spoon. Let the
eggs cool enough to handle with your bare hands and trim the edges with a paring
knife, making them nice and smooth and oval. Poached eggs prepared in this
manner can then be refrigerated in ice water until you are ready to serve them,
and a quick dip of about 30 seconds in simmering salted water will bring them
back up to serving temperature.
I have given you two recipes for classic dishes based on poached eggs below, but
what may be the best poached egg dish of all is also the easiest. Just poach a
couple of eggs and put them on a slice or two of hot buttered toast. Poached
eggs on toast just might be the original comfort food.
There are competing versions of the origin of this dish, but it is safe to say
that it originated in New York City around the turn of the 20th century. If you
have never had this dish, then treat yourself and fix it soon.
Eggs Benedict
4 to 6 eggs
2 to 3 English muffins, halved, toasted, and buttered
or 4 to 6 slices toasted, buttered bread
4 to 6 slices Canadian bacon or ham
1 cup (250 ml)
blender hollandaise
Place 2 inches (5 cm) of salted water in a large, wide saucepan or skillet and
bring it to a simmer over moderate heat. Do not boil. Crack the eggs, one at a
time, into a small bowl or tea cup and gently lower the egg into the water.
Repeat with all the eggs. Simmer for 3 to 5 minutes, until the desired degree of
doneness. Remove the eggs with a slotted spoon or small strainer and drain on a
clean dish towel. Quickly saute the Canadian bacon or ham, just to warm it
through. Place the Canadian bacon on the English muffin halves, top with a
poached eggs, and spoon the hollandaise sauce over all. Serves 4 to 6.
This dish is frequently served as a breakfast or luncheon item,
but it also makes an absolutely elegant first course.
Eggs Florentine
3 Tbs (45 ml) butter
3 Tbs (45 ml) finely chopped shallot or onion
3 Tbs (45 ml) all-purpose flour
1 1/2 cups (375 ml) heavy cream, half-and-half, or milk
A grating of fresh nutmeg
Salt and freshly ground pepper to taste
2 cups (500 ml) finely chopped cooked fresh or frozen spinach, squeezed dry
4-6 poached eggs
1/4 cup (60 ml) freshly grated Parmesan cheese
1/4 cup (60 ml) bread crumbs
Heat the butter in a small saucepan over moderate heat and saute the shallot for
5 minutes. Stir in the flour and cook, stirring constantly, for 3 minutes. Stir
in the cream and bring to a boil, stirring frequently. Season with nutmeg, salt,
and pepper. Combine 1/3 of the sauce with the spinach and spread into the bottom
of a small buttered baking dish. Arrange the poached eggs on the bed of spinach
and spoon the remaining sauce over the eggs. Sprinkle with the grated Parmesan
and bread crumbs and place under a preheated broiler. Cook until lightly browned
on top and serve immediately. Serves 4 to 6.
Return to the
Index of Recipes.
Soufflés
I have to confess that one of the reasons I have included
soufflés in my list of 40 (now 42) Fundamental Foods is the snob factor. They
have a largely undeserved reputation for being complicated or difficult to
prepare, so if you choose to serve a soufflé at your next dinner party, I
suggest you let people think that you slaved all day.
Another reason they are included is because of their remarkable versatility.
They can be flavored with practically anything, either sweet or savory, and they
can be served at any time during a meal, either as an appetizer, side dish, main
dish, or dessert.
Astute readers will notice that both the soufflé recipes I have included below
begin with something resembling a béchamel sauce. There are other ways to make
things resembling soufflés, some of which include adding gelatin or other
thickening agents to beaten egg whites, but the method I have illustrated below
will produce soufflés in the classic French manner. I have included recipes for
both a sweet and a savory soufflé which I hope you will modify with your own
flavorings.
Parmesan Soufflés (Soufflés au Parmesan)
2 cups (500 ml) milk
3/4 cup (180 ml) all-purpose flour
Salt and freshly ground pepper to taste
A grating of fresh nutmeg
2 oz (55 g) Parmesan cheese, grated
2 Tbs (30 ml) unsalted butter
4 eggs, separated
Bring the milk to a boil over moderate heat. Remove from the heat and stir in
the flour until the mixture is completely smooth. Season with salt, pepper, and
nutmeg. Bring to a boil again, stirring constantly. Remove from the heat and
stir in the cheese, butter, and egg yolks. Beat the egg whites until stiff and
fold into the milk mixture. Pour into 4 buttered 3-inch (8 cm) soufflé dishes or
ramekins. Bake for 10 minutes in a pre-heated 325F (160C) oven. Serve
immediately. Serves 4.
Soufflés have the reputation of being difficult to make, a myth I
accuse French chefs of creating in order to charge exorbitant prices for these
light and airy creations in fancy restaurants.
Vanilla Soufflé
1 1/2 cups (375 ml) milk
1/2 cup (125 ml) sugar plus additional for preparing the baking dish
1 vanilla bean, or 1 tsp (5 ml) vanilla extract
4 Tbs (60 ml) butter
1/3 cup (80 ml) all-purpose flour
4 eggs, separates
A pinch of salt
Powdered (confectioner's) sugar for garnish
Combine the milk and sugar in a small saucepan. Split the vanilla bean
lengthwise, scrape out the seeds, and add the seeds and pod to the milk mixture.
Bring to a simmer - do not boil - over moderate heat, remove from the heat and
let steep for about 15 minutes. Remove and discard the vanilla pod. (The above
steps can be eliminated if you are using vanilla extract and the ingredients
added when the recipe calls for the milk mixture below.) Heat the butter in a
separate saucepan over moderate heat and stir in the flour. Cook, stirring
frequently, for 3 minutes. Whisk in the milk mixture, stirring until the mixture
thickens. Remove from the heat, let cool for a few minutes, and stir in the egg
yolks. Beat the egg whites and salt until stiff peaks form. Stir about 1/3 of
the egg whites into the milk mixture to lighten it, the fold in the remaining
egg whites. Transfer to a soufflé or deep baking dish that has been coated on
the inside with butter and sugar. Bake on the center rack of a preheated 375F
(190C) until the top is brown, the sides are firm, and the center is still
moist, about 30 minutes. Dust with powdered sugar and serve immediately. Serves
4 to 6.
Return to the
Index of Recipes.
Stocks
I can't imagine a list of 50 Fundamental Foods for the Serious
Cook that didn't include stocks. In fact, I think if I had to put together a
list of 1 Fundamental Food for the Serious Cook, it would be stock. They are the
backbone of fine cooking in virtually every category of restaurant, and most
professional chefs would feel handicapped without them.
If you think of stocks as water that tastes really good, and then apply them to
virtually any cooking situation that requires water, you'll get some idea of the
many ways they are used in professional kitchens. They lend flavor to just about
any food that is boiled or braised, and they form the basis of too many sauces
to count. They enhance the flavor of every vegetable, meat, seafood, starch,
grain, and legume they come in contact with, and there would be no such thing as
soups without them. There is no single more important skill that a serious cook
should master than making a good stock. Here I offer the two basic stocks that
will take care of about 99 percent of your cooking needs.
You can eliminate the roasting step in this basic recipe if you are pressed for
time, but the roasting provides a darker, richer stock with an added dimension
of flavor. Use this stock as the base for French onion or any hearty soup, or
just to add flavor to rice, noodles, or sauces.
Beef Stock
4 lbs (2 Kg) meaty beef bones
2 onions, roughly chopped
2 carrots, roughly chopped
2 ribs celery, roughly chopped
4 quarts (4 L) water
1 bunch parsley
1 bay (laurel) leaf
1/2 tsp (2 ml) dried thyme
12 whole peppercorns
2 whole cloves
Salt to taste
Place the beef bones, onions, carrots, and celery in a roasting pan and bake in
a preheated 500F (260C) oven, turning everything once or twice, until browned,
about 30 minutes. Combine the bones and vegetables and the remaining ingredients
in a large pot over high heat and bring to a boil. Reduce the heat and simmer
covered for 3 hours. Strain the stock, pressing on the meat and vegetables to
extract as much liquid as possible. Refrigerate and skim off and discard the fat
that congeals on the surface. Keep refrigerated for up to 4 days, or freeze for
up to 1 year. Makes about 4 quarts (4 L).
Any good chicken soup must be made with the best chicken stock.
Although some canned preparations are good enough to substitute in a pinch, I
strongly recommend making your own stock for any recipe in which the broth is
the star.
Chicken Stock
1 Tbs (15 ml) vegetable oil
1 medium onion, chopped
4 lbs (900 g) chicken legs, chopped with a cleaver into 2-inch (5 cm) pieces
8 cups (2 L) boiling water
Salt to taste
8 - 12 whole black peppercorns
2 bay (laurel) leaves
Heat the oil in a large soup pot over moderate heat and saute the onion until it
is tender but not browned, about 5 minutes. Using a slotted spoon, transfer the
onion to a large bowl. Brown the chicken pieces a few at a time on all sides in
the oil remaining in the pot and transfer them to the bowl containing the onion
as the rest of the chicken pieces are browned. Return the chicken pieces and
onion to the pot. Reduce the heat to low and cook tightly covered for 20
minutes. Add the boiling water, salt, peppercorns, and bay leaves. Return to a
simmer, cover, and simmer over low heat for 30 minutes. Strain the stock and
refrigerate for at least 6 hours, until the fat has risen to the surface and
congealed. Skim off and discard the fat. Reheat before using. Makes about 2
quarts (2 L).
Return to the
Index of Recipes.
Sauces
Gravy
I know that many cooks feel intimidated by making gravy, probably
because they have been served lumpy, gooey gravy in the past. It's really quite
easy to make smooth and delicious gravy if you just think of it as a modified
white sauce.
Pan gravy, as it is often called, in its simplest form can be nothing more than
the deglazed drippings left behind when a meat is roasted or fried. The brown
bits left in the pan are dissolved with a liquid such as stock, wine, or water,
and served as a sauce.
A more typical style of gravy involves thickening the sauce with a starch of
some sort. Flour is the most common additive, but cornstarch, arrowroot, and
other thickeners (such as bread crumbs) can be used. (If you plan to thicken
your gravy with cornstarch or arrowroot, you should eliminate the roux portion
of these instructions and simply stir the starch with a little cold water before
adding it to the liquid produced by deglazing the pan.) Flour has the
unfortunate habit of forming lumps when added to a liquid, so it has to be
cooked in a fat of some sort before a liquid is introduced.
The fat, in the case of pan gravy, is provided by the meat that was cooked in
the pan. A little flour is stirred into the fat, which is then cooked until a
smooth paste (roux) is formed. The roux can be cooked until it turns brown if a
brown gravy is desired. Then a liquid is stirred into the roux, brought to a
boil, seasoned with salt and pepper, and served as a sauce.
If you have a pan that was used to cook the meat you are going to serve with the
gravy, then use the same pan and the fat remaining in it, adding or subtracting
to make a total of 1/4 cup. Otherwise, gravy can be made from scratch by using
the proportions given here.
Black Pepper Gravy
4 Tbs (60 ml) fat from pan drippings, or bacon grease, oil, or butter
4 Tbs (60 ml) all-purpose flour
2 cups (500 ml) milk
4 tsp (20 ml) coarsely ground pepper
Salt to taste
Heat the pan drippings or other fat in a skillet over moderate heat and stir in
the flour. Cook, stirring frequently, until smooth and lightly browned. Add the
milk, stirring until the gravy comes to a boil. Season with pepper and salt and
simmer, stirring frequently, for 5 to 10 minutes. Makes about 2 1/2 cups (625
ml).
Return to the
Index of Recipes.
Hollandaise Sauce
The magic of sauces is one of the things that first attracted me
to cooking; they transform the ordinary into the extraordinary. In the French
cooking tradition Hollandaise sauce is one of the "mother" sauces, upon which
many other sauces are based. Poached eggs on toast becomes Eggs Benedict with
this sauce (plus a couple of other ingredients), and tomatoes, asparagus,
broccoli, Brussels sprouts, cauliflower, and artichokes are raised to new
heights with the addition of this basic sauce. Use it on fish, poultry, beef,
and veal as well. Here I have outlined the classic approach as well as a modern
"quick and easy" method, along with some variations that will elevate almost any
meal.
Classic Hollandaise Sauce
8 Tbs (1 stick, 110 g) butter, melted and warm (not hot, you should be able to
put the tip of your finger in it)
2 Tbs (30 ml) lemon juice
3 egg yolks
4 Tbs (60 ml) boiling water
Salt and white pepper to taste
Heat the lemon juice in a small saucepan held over (not in) a larger pot of
boiling water. Add the three egg yolks, beating constantly with a wire whisk.
Add the boiling water, one tablespoon at a time, whisking constantly until the
mixture is slightly thickened. Continue to beat while adding the warm butter
slowly, a tablespoon at a time, until the sauce is thick and creamy. Do not over
heat or the eggs will curdle. Season to taste with the salt and white pepper.
Makes about 1 cup (250 ml).
Blender Hollandaise Sauce
(Note: This recipe does not multiply well. If you need more than 1 cup make
separate batches rather than one large batch.)
8 Tbs (1 stick, 110 g) butter,
3 egg yolks
2 Tbs (30 ml) lemon juice
Salt and white pepper to taste
Melt the butter over a low flame until it begins to bubble. Remove from heat.
Put the egg yolks, lemon juice, salt and white pepper in the container of an
electric blender. Cover and blend on high speed for about 5 seconds. Remove the
cover and add the butter in a slow stream, blending at high speed for
approximately 30 seconds more. The sauce should be smooth with no traces of
unincorporated butter. If it is not, replace the cover and continue blending
until the butter is completely incorporated, scraping the sides of the blender
(with the motor off) if necessary. Makes about 1 cup (250 ml).
Hollandaise Variations
Béarnaise Sauce - A classic on beef. Heat 4 Tbs (60 ml) of red
wine vinegar, 1/2 tsp (2 ml) dried tarragon (or 1 tsp (5 ml) fresh), and 1 Tbs
(15 ml) finely chopped shallots or chives until reduced by half and use in place
of the lemon juice.
Mousseline Sauce - Great on vegetables and fish. Fold 1/4 cup
(60 ml) of heavy cream, lightly whipped, into 1 cup (250 ml) of Hollandaise just
before serving.
Choron Sauce - Excellent on fish, poultry, and eggs. Add 1 Tbs
(15 ml) tomato paste to 1 cup (250 ml) Hollandaise.
Maltaise Sauce - Great on fish and vegetables. Substitute
orange juice for the lemon juice, and add 1 tsp (5 ml) grated orange zest.
Return to the
Index of Recipes.
Tomato Sauce
Depending on whom you ask, tomato sauce is usually included among
the "mother sauces" that form the foundation of many other sauces. Its uses are
countless, from the classic Italian pasta al pomodoro to a sauce for
meats, vegetables, potatoes, rice, and pizza. And keep in mind that this sauce
can also serve as a base for a variety of hot and cold soups. Diluted with some
chicken or vegetable stock, milk, cream, or even water, it can be turned into a
quick and easy tomato soup; add a few ingredients and you have minestrone or
Manhattan clam chowder.
There is no shame in using canned tomatoes in this recipe as they
are almost always of much higher quality than the fresh tomatoes available in
supermarkets. In fact, unless you can get tomatoes fresh from the vine in your
own or a friend's garden, I recommend canned tomatoes over anything you'll find
in the supermarket, regardless of the time of year. Canned San Marzano tomatoes
from Italy are considered by many to be the best, but any good quality canned
product will produce excellent results.
Use this basic recipe as a starting point for your own creations,
and consider adding onions, ham or bacon, fresh or dried herbs, grated cheese,
wine, mushrooms, or whatever strikes your fancy.
Basic Tomato Sauce
3 Tbs (45 ml) olive oil
2 - 4 cloves garlic, gently crushed
1 can (28 oz, 785 g) whole plum tomatoes
Or 2 lbs (900 g) ripe tomatoes, peeled*, seeded, and coarsely chopped
Salt and freshly ground pepper to taste
* To peel tomatoes, drop them into boiling water for 15 seconds, then into cold
water. The skin should peel off easily.
Heat the oil in a large skillet over moderate heat and saute the garlic cloves
until light golden brown. Drain the tomatoes and crush them with your hands,
removing the seeds if you prefer. Add the tomatoes and cook, stirring
occasionally, until the tomatoes have broken down, about 15 minutes. You may
remove the garlic at this point, or leave it in the sauce for more pronounced
flavor. Season with salt and pepper. The sauce can be passed through a food mill
or pressed through a fine-mesh strainer with the back of a spoon for a smoother,
more refined sauce. If not using immediately, store in an airtight container in
the refrigerator for up to 3 days, or freeze for several weeks. Makes about 2
cups (500 ml).
Return to the
Index of Recipes.
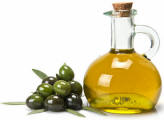
Vinaigrette Sauce
If you only learn to make one sauce in your life, this should be
the one. In classic French cooking, vinaigrette is one of the five "mother"
sauces on which a host of other sauces are based. In its simplest form it
consists of nothing more that vinegar, oil, salt, and pepper. It is most often
used to dress vegetables and salads, but is also often called upon as a marinade
for meats and fish.
Many cooks add a touch of mustard, and fresh chopped herbs are
often added. You can use any type of vinegar, or you can use lemon juice
instead; try experimenting with herb infused vinegars. Likewise, any type of oil
can be used, but make sure that it is of the best quality. Olive oil is most
often used, but other oils lend their distinctive characteristics. One of my
favorite variations uses raspberry vinegar and walnut oil.
Any classically trained French chef will tell you that it is
absolutely essential that the oil be added slowly in a thin stream while the
sauce is being vigorously whisked. I'm telling you that this is true only for
those of us who are lucky enough to have three hands for the simultaneous
drizzling, whisking, and steadying of the bowl. Those of us who are equipped
with only two hands can still make a perfect vinaigrette simply by combining the
ingredients in a bowl and whisking until emulsified. Heck, you can even combine
the ingredients in a jar and shake it vigorously, eliminating the need for a
whisk entirely. (I use an empty bottle of commercial salad dressing for this
purpose.)
The classic ratio of oil to vinegar is 3:1, or according to some
sources, 4:1. Use your own judgment and let your taste buds be your guide as the
ratio will vary according to the types of oil and vinegar you use, and the
intended use for the sauce. Keep in mind that, when it comes to seasoning with
salt and pepper, you are actually seasoning the final dish that the vinaigrette
will be added to, so don't be afraid to be generous with the salt and pepper.
If you are planning to use the vinaigrette as a marinade,
consider adding red or white wine, sherry, Worcestershire sauce, soy sauce, or
any other flavorful additions you like. Sweeteners such as honey, brown sugar,
molasses, or fruit preserves are also common additions, and will not only lend
sweetness but will also aid in browning if the food is to be cooked by a
high-heat method such as sauteing or grilling.
Here is the classic recipe for the most basic vinaigrette sauce
which I hope will serve as a springboard for many unique and original creations
limited only by your imagination as a creative cook.
Vinaigrette Sauce
1 Tbs (15 ml) finely chopped shallot or onion
1 tsp (5 ml) Dijon-style mustard
1/4 cup (60 ml) red wine vinegar
Salt and freshly ground pepper to taste
3/4 cup (180 ml) extra virgin olive oil
Combine the shallot, mustard, vinegar, salt, and pepper in a
small mixing bowl and whisk until thoroughly combined. Add the oil in a thin
stream, whisking constantly. If the sauce separates before being used it may be
recombined by whisking vigorously for a few seconds. Makes about 1 cup (250 ml).
Return to the
Index of Recipes.
White Sauce
If you only learn to make one sauce in your life, this should be
the one... okay, I know I said exactly the same thing about vinaigrette sauce,
but it's true for both of them, so I guess there are two sauces every serious
cook really needs to master.
Basic white sauce, or béchamel sauce, is another of the "mother" sauces that
serve as a base for countless variations. Used by itself, it is the "cream" in
creamed vegetable and meat dishes. With other flavorings added it becomes an
adaptable and versatile sauce for all types of dishes, and is an essential
component of a variety of dishes such as many versions of lasagna, the Greek
classics moussaka and pastitsio, and good old-fashioned macaroni and cheese.
The classic proportions are 2 tablespoons (30 ml) fat and 2 tablespoons (30 ml)
flour to a cup (250 ml) of liquid. Any fat or oil can be used, but there really
is no better alternative than butter. The liquid is usually milk, but other
liquids may be used, and all of them can be enriched by the addition of cream
and/or egg yolks. The thickness of the sauce may be controlled byadjusting the
quantities of flour and liquid.
Basic White Sauce (Béchamel Sauce)
2 Tbs (30 ml) butter
2 Tbs (30 ml) flour
1 cup (250 ml) milk
Salt and freshly ground pepper to taste
A grating of fresh nutmeg
Melt the butter in a saucepan over moderate heat. Stir in the flour and cook for
2 to 3 minutes, until the flour aroma is gone. Add the milk and stir with a wire
whisk over moderate heat until the sauce comes to a boil and has thickened.
Season with salt, pepper, and nutmeg. Makes about 1 cup (250 ml.)
White Sauce Variations
Mornay Sauce - Excellent with fish, egg, and vegetable dishes.
Add 2 Tbs (30 ml) grated Parmesan cheese and 2 Tbs (30 ml) grated Gruyere cheese
to a recipe of basic white sauce.
Cheese Sauce - Great on steamed vegetables, especially broccoli
and cauliflower. Add 1/2 cup (125 ml) grated cheddar cheese, a dash of cayenne
pepper, and 1/2 tsp (2 ml) dry mustard to a recipe of basic white sauce.
Velouté Sauce - A classic accompaniment to fish, poultry, and
meat dishes. Substitute 1 cup (250 ml) chicken, fish, or beef stock for the milk
in the basic white sauce recipe, depending on what type of dish the sauce is to
accompany.
Aurore Sauce - Classically served with Dover sole, it is great
with any fish or vegetable dish. I also use this on pasta. Add 1 Tbs (15 ml)
tomato paste to a basic white sauce recipe.
Sauce Soubise or White Onion Sauce - Good on fish and poultry.
Saute 1 chopped medium-sized onion in 2 Tbs (30 ml) butter until it is
transparent. Add to a recipe of velouté or basic white sauce and simmer over low
heat for 30 minutes. Strain prior to serving.
Curry Sauce - Serve with fish or (my favorite) mix with sliced
hard boiled eggs and serve over toast. Add 1 Tbs (15 ml) curry powder and
cayenne pepper to taste to the melted butter along with the flour in the basic
white sauce recipe.
Horseradish Sauce or Sauce Albert - A classic accompaniment to
boiled or corned beef. Add 3 Tbs (45 ml) prepared horseradish, 2 Tbs (30 ml)
whipping cream, and 1 Tbs (15 ml) sugar to a recipe of basic white sauce.
Return to the
Index of Recipes.
Soups
and Stews
Chili
Do I really need to tell you how chili got a place on my list of
50 Fundamental Foods? It's an economical, traditional, flexible, delicious,
easy, historic, and classic American dish. 'Nuff said.
In Texas, where chili purists abound, adding tomatoes or beans, or using ground
beef, are all things that only a greenhorn would do to a good "bowl o' red."
This version is much closer to the way chili might have been served to the
cowhands from the chuck wagon.
Authentic Texas Chili
2 oz (55 g) dried whole chiles such as pasilla, guajillo, or New Mexico chiles
2 tsp (10 ml) cumin seed, toasted in a dry skillet and ground
Salt and freshly ground pepper to taste
1/4 cup (60 ml) lard or vegetable oil
2 lbs (900 g) beef chuck, trimmed of excess fat and cut into 3/4-inch (2 cm)
cubes
1 onion, finely chopped
2-4 cloves garlic, finely chopped
2 cups (500 ml) beef stock
2 cups (500 ml) water
2 Tbs (30 ml) masa harina*
1 Tbs (15 ml) brown sugar
1 Tbs (15 ml) white vinegar
Sour cream for garnish (optional)
* Available in the flour section of most supermarkets and Hispanic grocery
stores
Toast the chiles in a dry skillet over moderate heat just until they change
color and become fragrant. Place in a bowl, cover with hot water, and soak for
30 minutes. Drain the chiles and remove the stems and seeds. Place in an
electric blender with the cumin, salt, and pepper and puree to make a thick
paste, adding a little of the soaking liquid or water if necessary. Set the
chile paste aside.
Heat the lard in a large pot over high heat and brown the beef in batches,
transferring it to a plate as it is done. When all the beef has been browned,
reduce the heat and saute the onion and garlic to the same pot until lightly
browned, about 5 minutes. Add the reserved beef, beef stock, water, masa harina,
and the reserved chili paste, stirring to combine. Bring to a boil, reduce the
heat to the lowest setting and simmer uncovered for 2 hours, stirring
occasionally. Stir in the brown sugar and vinegar. At this point there should be
about 2 cups of liquid. Let the chili stand for at least 30 minutes, during
which time the meat will absorb about half of the remaining liquid. The sauce
should be thick and barely fluid, and it may be adjusted with a little more masa
harina if it is too thin, and with a little water or beef stock if you think it
is too thick. Adjust the seasoning with cumin, salt, pepper, brown sugar, or
vinegar as needed. Reheat before serving, topped with a dollop of sour cream if
desired. Serves 4 to 6.
Return to the
Index of Recipes.
Clam Chowder
Clam chowders made my list of the 50 Fundamental Foods because
they are another example of the beauty of simple ingredients simply prepared,
and because I am crazy about clam chowders of every type.
As far as the various types are concerned, the most often found variation is the
cream-based version usually called New England clam chowder. Those with a
tomato-based broth are usually called Manhattan clam chowder, and a version that
has fish stock or bottled clam juice as its base, without either cream or
tomatoes, is known as Rhode Island clam chowder.
Nothing beats a homemade version though, even if you can't get fresh clams. New
Englanders swear that the soup tastes better if allowed to sit at room
temperature for a couple of hours, or overnight in the refrigerator, before
serving.
New England Clam Chowder
3 dozen hard shell clams, shucked, with their juices reserved (about 3 cups, 750
ml) or 2 cups (500 ml) canned chopped clams
2 medium-sized potatoes, peeled and cut into 1/2 inch (1 cm) dice (about 2 cups,
500 ml)
2 oz (50 g) salt pork or bacon, cut into 1/4 inch (5 mm) dice
1 cup (250 ml) finely chopped onions
2 cups (500 ml) milk
1/2 (125 ml) cup heavy cream
Salt and freshly ground black pepper to taste
4 tsp (20 ml) butter (optional)
If using fresh clams separate the soft part of the clams (stomach) from the hard
part surrounding it. Finely chop the hard part and set aside, and slice each
soft part in two and reserve separately. Strain the clam liquor through two
layers of cheesecloth and set aside. If using canned clams, drain the clams in a
fine sieve over a bowl and reserve the liquid. In a large soup pot saute the
salt pork over low heat until crisp and they have rendered all their fat. Remove
and reserve. Add the onions to the fat remaining in the pot and cook over
moderate heat for about 5 minutes, until they are translucent but not brown.
Stir in the reserved clam liquor, the finely chopped fresh clams (do not add
canned clams at this point), the milk, and the potatoes. Cover and simmer 10 to
15 minutes, until the potatoes are tender. Stir in the reserved soft parts of
the clams (or the canned clams), the reserved salt pork or bacon, and the cream,
and simmer for an additional 3 minutes. Adjust the seasoning with salt and
pepper. Allow to rest off heat for one to two hours, then reheat immediately
before serving. Ladle into warm bowls, and place a teaspoon (5 ml) of butter on
top of each serving (optional, but very traditional). Serves 4.
No one knows why tomato-based clam chowder is called Manhattan
clam chowder, especially since it was first documented in Rhode Island in the
1830s. Regardless of its provenance, it's an American classic.
Manhattan Clam Chowder
2 oz (50 g) salt pork, cut into 1/4-inch (5 mm) dice
3 dozen hard shell clams, shucked, with their juices reserved (about 3 cups, 750
ml) or 2 cups (500 ml) canned chopped clams
2 cups (500 ml) water
1 cup (250 ml) clam liquor reserved from the fresh clams, or bottled clam juice
6 tomatoes, peeled, seeded, and chopped
2 potatoes, peeled and cut into 1/2-inch (1 cm) dice
1 onion, chopped
1 stalk celery, chopped
1 carrot, chopped
1 green bell pepper (capsicum), chopped
1/4 cup (60 ml) tomato paste
1 bay (laurel) leaf
1/2 tsp (2 ml) dried thyme
Salt and freshly ground pepper to taste
Hot sauce to taste (optional)
Brown the salt pork in a skillet over moderate heat until golden. Drain on paper
towels and combine with the remaining ingredients in a large saucepan. Bring to
a boil over moderate heat, reduce the heat and simmer covered for 2 hours. The
taste improves if refrigerated overnight. Serves 4 to 6.
Return to the
Index of Recipes.
Cream Soups
I have included cream soups in my 50 Fundamental Foods for
several reasons, but probably the biggest reason is that a single master recipe
can produce hundreds of different soups. The basic recipe is simplicity itself:
cook almost any vegetable in chicken, beef, or vegetable stock (or even water)
until tender, puree using any of various methods, and then add milk, cream, or
half-and-half to your liking. The resulting soups can be served hot or cold.
I have published recipes using this basic formula, with only slight
modifications, based on ingredients such as asparagus, artichoke hearts,
tomatoes, summer and winter squashes, cauliflower, broccoli, lettuce, sorrel,
daikon, corn, Belgian endive, mushrooms, several types of beans, celery, fennel,
and peas. And that's only the beginning of the list of possibilities.
Not only do you probably have the ingredients on hand to make at least a
half-dozen variations on the theme (which is reason enough why every serious
cooks needs to include them in their repertoire), but you can probably make a
soup in less time, with less effort, and more economically than any other method
of making soup. Cream soups are real winners, no matter how you look at them.
Cream of Asparagus Soup
1 lb (500 g) fresh asparagus
4 cups (1 L) chicken or vegetable stock
1 sprig of fresh thyme (optional)
1 cup (250 ml) milk, half-and-half, or heavy cream
Salt and freshly ground pepper to taste
Wash the asparagus and cut into 1-inch (2 cm) pieces. Combine with 2 cups (500
ml) of the stock and the sprig of thyme in a saucepan. Bring to a boil over high
heat and simmer covered for 5 to 8 minutes, until very tender. Remove and
discard the thyme. Puree in an electric blender or food processor until smooth.
Return to the saucepan and add the remaining stock, milk or cream, salt and
pepper, and bring to a simmer. If desired, the cooked tips of the asparagus may
be reserved prior to pureeing and added as a garnish when served. Serves 4 to 6.
Return to the
Index of Recipes.
Gazpacho
Every serious cook needs a good cold soup in their repertoire,
and you can't go wrong with gazpacho. I chose this dish as one of the 50
Fundamental Foods because it illustrates a couple of very basic concepts: first,
nothing beats fresh, natural ingredients; and second, restraint is one of the
many skills that a skilled cook needs to master. Sometimes, when it comes to
preparation and technique, less is more, and no other dish illustrates this
better than gazpacho.
While I normally encourage experimentation, this is one recipe I hope you will
not fiddle with by trying to use shortcuts such as canned tomatoes and processed
tomato juice. They have no place in this recipe, and only the freshest tomatoes,
recently plucked from the vine, should be used. This may be the only time I ever
recommend against using canned tomatoes, and I really mean it.
Gazpacho is probably the most famous Spanish dish, and it is a staple in Spanish
homes, especially during the hot summer months when tomatoes are at their best
and a chilled soup is most welcome. In addition to the standard garnishes of
cucumber, peppers, and onion that are served with almost all restaurant
versions, I have included some other traditional garnishes that might be found
in a typical home-style recipe.
Andalusian-Style Gazpacho (Gazpacho Andaluz)
3 oz (75 g) French or Italian bread, crusts removed
2 lb (900 g) fresh ripe tomatoes, peeled if desired
4 cloves garlic, peeled
1/2 small onion, peeled
Salt and freshly ground pepper to taste
1/4 tsp (1 ml) ground cumin
6 Tbs (90 ml) extra-virgin olive oil
4 Tbs (60 ml) red wine vinegar
About 1 cup (250 ml) water
For garnish (all garnishes are optional):
Green bell pepper, seeded and finely chopped
Cucumber, peeled and finely chopped
Onion, peeled and finely chopped
Toasted croutons
Hard-boiled eggs, peeled and finely chopped
Green apples, finely chopped
Ripe melon, finely chopped
Whole seedless grapes
Cooked ham, finely chopped
Raisins
Olives, finely chopped
Fresh mint leaves, finely chopped
Dried figs, finely chopped
Soak the bread in enough water to cover for 15 minutes. Squeeze out the excess
water and place the bread in the bowl of an electric food processor or blender.
Add the tomatoes, garlic, onion, salt, pepper, and cumin and process until
pureed. While the processor is running add the olive oil in a thin stream,
followed by the vinegar. Add water to adjust the consistency - it should be
thick but still very liquid. Chill in the refrigerator for at least 1 hour
before serving. Serve in soup bowls or tall glasses with the optional garnishes
of your choice. Serves 6 to 8.
Return to the
Index of Recipes.
Side
Dishes
Braised Vegetables
Unlike many methods of cooking vegetables such as steaming,
boiling, or microwaving, braising actually adds flavor during the cooking
process, and that is why it is one of my favorite methods of cooking vegetables.
The long, slow cooking in a flavorful liquid not only tenderizes even the
toughest of vegetables, but they actually absorb some of the stock or wine they
are being cooked in. This method is extremely effective with most vegetables
like broccoli, cauliflower, and all the other members of the cabbage family, and
with carrots, onions, potatoes, and other root vegetables. The method really
stands out when cooking some vegetables we often serve raw because the other
methods of cooking them don't do anything to enhance their flavor. Try braising
vegetables such as cucumbers, Belgian endive, fennel, lettuce, and celery and
you may decide you'll never serve them raw again.
You will get excellent results if you just boil the vegetables in a flavorful
liquid, but the real advantage of braising comes when you allow the cooking
liquid to reduce to a glaze, forming a sauce that combines the flavors of the
liquid and the vegetables themselves.
Braising is a technique that every serious cook has used to cook meats (think
pot roast and beef stew), but we often forget that it is an equally valuable
technique when cooking vegetables as well. Let's all promise not to forget this
in the future.
Braised vegetables gain yet another dimension of flavor when they are lightly
browned before braising, as in this recipe.
Braised Onions
3 Tbs (45 ml) olive oil
4-6 large onions, peeled
1 1/2 cups (375 ml) beef stock
2 bay (laurel) leaves
Salt and freshly ground pepper to taste
Heat the oil in a large heavy pot big enough to hold the onions in a single
layer over moderate heat and saute the whole onions, stirring frequently, until
lightly browned all over, about 10 minutes. Arrange the onions root end down in
the pot, add the beef stock and bay leaves, and bring to a boil. Season with
salt and pepper and bake covered in a preheated 350F (180C) oven for 45 minutes.
Remove the cover and bake until the onions are nicely browned and tender in the
center, about 15 minutes. Serves 4 to 6.
Return to the
Index of Recipes.
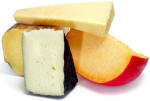
Macaroni and Cheese
Macaroni and cheese is one of my fundamental foods for the simple
reason that it is one of my favorite dishes. You can add dishes to your list for
equally capricious and arbitrary reasons, but this is my list and macaroni and
cheese is on it.
When food gurus talk about genuine American foods, they usually mention
hamburgers, hot dogs, Boston baked beans, and apple pie, to name just a few. A
truly American dish that is often overlooked when compiling such a list is
macaroni and cheese. Granted it is a combination of influences from Italy
(macaroni) and England (Cheddar cheese), the dish dates back to Thomas Jefferson
in America.
Classic Macaroni and Cheese
1/2 cup (125 ml) chopped yellow onion
3 Tbs (45 ml) butter
2 tsp (10 ml) Dijon mustard
1 lb (500 g) sharp Cheddar cheese, shredded
1/2 cup (125 ml) milk
Salt and freshly ground pepper to taste
1/2 lb (250 g) elbow macaroni or other small pasta shape, cooked according to
the package directions
1/3 cup (80 ml) bread crumbs or crushed saltine crackers
Saute the onions in 2 tablespoons (30 ml) of the butter in a large heavy
saucepan over moderate heat until soft but not brown. Add the mustard, cheese,
milk, salt, and pepper, and stir until the cheese is melted and the sauce is
smooth. Stir in the cooked macaroni and pour the mixture into a buttered 3-quart
(3 L) baking dish. Melt the remaining butter in a small saucepan and mix with
the bread crumbs. Sprinkle the bread crumbs on top of the macaroni and cheese
and bake in a preheated 375F (190C) oven for 25 to 30 minutes, until it is
bubbling and brown. Serves 4 to 6.
Return to the
Index of Recipes.
Mashed Potatoes
Mashed potatoes earned a place on my list of 50 Fundamental Foods
for a couple of reasons, first among them being the fact that it is a tricky
dish. It isn't difficult to make a smooth, creamy bowl of mashed potatoes, but
it is equally easy to produce a sticky, gooey mess.
Using the wrong kind of potatoes, cooking them too long, and excessive beating
will all cause the cell walls of the potato to break and release a starchy
component called amylose, resulting in mashed potatoes with the consistency of
wallpaper paste. Be careful to cook the potatoes just until they are tender and
easily pierced with the tip of a paring knife.
Many cooks simply mash the potatoes with a potato masher or electric mixer, but
the only way to achieve perfect smoothness is to pass the cooked potatoes
through a ricer or food mill. I like lumpy mashed potatoes as much as the next
guy, but when I want mashed potatoes that are good enough to brag about, I pull
out my grandfather's old potato ricer every time.
The consistency of the finished dish is a matter or personal preference. Many
people like their mashed potatoes relatively dry and choose to top them with
butter or gravy for added moisture. Others (including many classically trained
French chefs) prefer their mashed potatoes on the runny side, with a consistency
akin to a very thick sauce. The choice is yours, and either is easily achieved
by altering the amount of liquid in the recipe.
This is Julia Child's recipe for a classic French version of mashed potatoes.
Garlic Mashed Potatoes
2 lbs (900-1350 g) russet or Yukon Gold potatoes, peeled and quartered
12-16 whole cloves of garlic, peeled
2 Tbs (30 ml) butter, or more to taste
1/2 cup (125 ml) cream or milk, or more to taste
Salt and freshly ground white pepper to taste
Boil the potatoes in salted water until tender, about 15 minutes. Drain and
return to the pot. Keep the pot over very low heat to dry the potatoes for 10 to
15 minutes. Meanwhile combine the garlic and butter in a small saucepan over low
heat and cook until the garlic is tender but not brown, about 15 minutes. Add
the cream and simmer for 10 minutes. Puree the mixture in an electric blender or
food processor. Put the potatoes through a potato ricer or mash with an electric
mixer and stir in the garlic mixture, salt, and white pepper. Add more cream
and/or butter if desired. Serves 4 to 6.
Return to the
Index of Recipes.
Potato Salad
There comes a time in the life of every serious cook when
circumstances require a potato salad, and no other dish will do. Whether is it
because finicky eaters need to be appeased, or a large amount of food is needed
for an especially large crowd, or simply because it is about as economical a
side dish as you'll find anywhere, potato salad fills the bill.
Actually more of a side dish than a salad in the traditional sense, potato
salads are popular throughout the Western world, and regional variations abound.
They can generally be divided into two categories: those dressed with oil and
vinegar, and those dressed with mayonnaise-I have included recipes for both
below.
Additions can include cooked vegetables, raw onions, hard-boiled eggs, mustard,
capers, pickles, chopped ham, bacon, olives, anchovies, and any variety of fresh
or dried herbs. And because they can be served warm, chilled, or at room
temperature, they are a fixture at picnics, potlucks, and backyard cookouts all
over the world.
This French version of potato salad is traditionally served at room temperature.
However, by serving it warm and with the addition of crumbled bacon, it becomes
German potato salad.
French Potato Salad
1 1/2 - 2 lbs (675-900 g) medium red potatoes, scrubbed and cut into 1/4-inch (5
mm) slices
1/2 red onion, finely chopped
3 - 4 scallions (spring onions), green and white parts, finely chopped
1/4 cup (60 ml) chopped fresh parsley
2 Tbs (30 ml) red wine vinegar
2 tsp (10 ml) Dijon mustard
4 Tbs (60 ml) extra-virgin olive oil
Salt and freshly ground pepper to taste
Boil the sliced potatoes in salted water until tender but still firm, about 5 to
8 minutes. Drain and combine in a large bowl with the onion, scallions, and
parsley. Whisk together the vinegar and mustard. Add the olive oil in a thin
stream while whisking. Season with salt and pepper and pour over the potato
mixture. Toss gently to combine thoroughly. Let marinate at room temperature for
at least 2 hours before serving. Serve at room temperature. Serves 4 to 6.
This is a version of potato salad that is popular throughout
Latin America.
Ensalada Rusa
2-3 lbs (900-1350 g) boiling potatoes, peeled and cut into 3/4-inch (2 cm) dice
1-2 medium carrots, peeled and cut into 1/4-inch (5 mm) dice
1 cup (250 ml) fresh or frozen green peas
1/4 cup (60 ml) sour cream, or more to taste
1/4 cup (60 ml) mayonnaise, or more to taste
2 Tbs (30 ml) chopped fresh parsley
Salt and freshly ground pepper to taste
Cook the potatoes, carrots, and peas separately in salted water until they are
tender but still firm. Drain and combine with the remaining ingredients, tossing
gently to combine well. Refrigerate covered for at least 2 hours or overnight.
Serves 4 to 6.
Return to the
Index of Recipes.
Risotto
Risotto makes my list of 50 Fundamental Foods because of its
simplicity and versatility, both reasons that appear frequently among the
members of this exclusive collection of dishes. All you need to know is the
basic technique and you'll never be at a loss for an elegant, nutritious, and
easily prepared side dish.
The basic technique involves toasting some medium- or short-grain rice briefly
in a little fat before gradually adding a liquid and other optional ingredients
until a smooth, creamy dish composed of al-dente rice coated in a sauce made by
the starch from the rice itself is formed. It can be flavored with just about
anything under the sun, and it welcomes the addition of virtually any savory
edible.
This classic risotto from the city of Milan demonstrates the basic technique.
Please feel free to add any seafood, meat, poultry, vegetables, or seasonings
that suit your fancy.
Saffron Risotto
About 5 cups (1250 ml) chicken or vegetable stock
1/2 tsp (2 ml) saffron threads
3 Tbs (45 ml) olive oil
1 medium onion, chopped
1 1/2 cups (375 ml) Italian short-grain rice such as Arborio or Carnaroli
1/2 cup (125 ml) dry white wine
Salt and freshly ground pepper to taste
2 Tbs (30 ml) butter
2 Tbs (30 ml) freshly grated Parmesan cheese
Combine the chicken stock and saffron in a saucepan over moderate heat and bring
to a simmer. Heat the olive oil in a separate pot over moderate heat. Add the
onion and cook until tender but not brown, about 5 minutes. Add the rice and
cook, stirring constantly, for 3 minutes. Add the wine and simmer over low heat
until most of the wine is absorbed. Add the chicken broth about 3/4 cup (180 ml)
at a time, allowing most of the liquid to be absorbed before adding more, and
stirring frequently as it cooks. When most of the liquid has been absorbed and
the rice is cooked "al dente," about 20 minutes, remove from the heat and stir
in the butter and Parmesan cheese. Serve immediately. Serves 4 to 6.
Return to the
Index of Recipes.
Roasted Vegetables
Oven roasting is not only my favorite way to cook vegetables, but
the resulting vegetables are also my all-time favorite side dish, and those are
the primary reasons I have included them in my 50 Fundamental foods. The dry
heat of the oven evaporates much of the water from the vegetables, and the
browning of the naturally occurring sugars further intensifies their flavor.
This recipe is really more of a procedure than a recipe, so I have not given any
quantities. Choose the vegetables according to what is good, fresh, and
available in your area.
Oven Roasted Vegetables
Fresh, good quality root vegetables such as potatoes, carrots, onions, turnips,
rutabagas (Swedes), beets, parsnips, sweet potatoes, and fennel
Several whole cloves of garlic
Olive oil
Salt and freshly ground black pepper to taste
Sprigs of fresh rosemary and/or thyme (or herb of your choice)
I prefer to leave the peel on the potatoes and carrots, but you may peel them if
you prefer. Peel the turnips, rutabagas, beets, parsnips, and sweet potatoes.
The garlic cloves may be peeled or unpeeled. Cut the vegetables into large
pieces of approximately the same size, so that they will all cook at the same
rate. Place them in a single layer on a baking sheet or in a baking pan and
drizzle them with the olive oil and sprinkle with liberal amounts of salt and
pepper. Toss the vegetables to coat them on all sides. If you use beets, place
them in a separate container so as not to color the rest of the vegetables. Add
the sprigs of fresh herbs and bake in a 400F (200C) oven for 45 minutes to an
hour, turning the vegetables occasionally, until they are fork-tender and
lightly browned.
Return to the
Index of Recipes.
Scalloped Potatoes
You would think that being one of my favorite dishes would
automatically guarantee it a place in my list of 50 Fundamental Foods, but it
takes more than that. A dish must possess other attributes, such as versatility,
ease of preparation, a flexibility that allows for changes based on ingredients
that are on hand, or the ability to please a crowd. Scalloped potatoes possess
all of these virtues.
They can be made rich and unctuous with lots of butter, cream, and cheese, or
they can be made using chicken stock, white wine, or even water for those
watching their calories. They can be made with only three or four ingredients,
or the frugal cook can use them to finish off a multitude of leftovers. They can
be a part of the simplest of meals, or one of the components of the most
elaborate of feasts.
No matter how they are done, scalloped potatoes are among the world's greatest
dishes, and this version is a classic.
Scalloped Potatoes
3 to 4 lbs (1.5 to 2 Kg) potatoes, peeled and thinly sliced
1 large onion, thinly sliced
4 to 6 Tbs (60 to 90 ml) butter
2 cups (500 ml) milk or cream
Salt and freshly ground pepper to taste
2 Tbs (30 ml) Dijon style mustard
1/2 tsp (2 ml) paprika
1/2 cup (125 ml) grated Parmesan cheese (or other cheese of your choice)
Place alternating layers of potatoes and onions in a greased baking dish. Dot
each layer with butter. Combine the milk or cream, salt, pepper, mustard, and
paprika in a saucepan and heat until almost boiling. Pour the milk mixture over
the potatoes and top with the grated cheese. Bake in a preheated 350F (180C) for
30 to 40 minutes, until the potatoes are tender. Serves 4 to 6.
Return to the Index
of Recipes.
Meats
Barbecued Pork
Before we get into the recipes, I need to say a thing or two
about the word "barbecue." First of all, there are two ways to spell it, either
"barbecue" or "barbeque." The first is preferred in the United States and most
of the English-speaking world, the second is preferred in Australia. To further
muddy the waters, the word has different meanings in addition to different
spellings.
To barbecue in most parts of the world is to simply cook over hot coals or
burning wood. However, in the United States there is a fine distinction between
grilling and barbecuing. To cook something directly over hot coals is properly
known as grilling, while barbecuing is a method of cooking over low, indirect
heat for a prolonged period of time. Grilling is high (heat) and fast,
barbecuing is low and slow. At least it is for the purposes of this discussion.
To further complicate matters, "barbecue" can also refer to the equipment used
to barbecue foods, as well as the social events where barbecued foods are cooked
and eaten. And finally, anything with a barbecue sauce on it can be said to be
barbecued.
Professional barbecuers, known as pit masters, use a variety of devices to cook
their barbecue, from simple outdoor grills and smokers to elaborate
constructions of brick, stone, or metal, often custom built to the pit master's
specifications. However, anyone with a decent outdoor grill can produce
excellent results if they follow a few simple guidelines.
Barbecued meats should never be cooked directly over hot coals or burning wood.
Follow the directions included with your grill for cooking by the indirect
method whenever you barbecue, and try not to let the temperature exceed 350F
(180C) at any time during cooking.
Smoke is also an essential component of authentic barbecue. I often start my
barbecued pork on my Weber grill, giving it some hickory or mesquite chips for
about 1 hour before moving the meat indoors to my oven where I can control the
temperature easier. Experiment with times and temperatures until you get it just
the way you like it.
Barbecued Pork Shoulder
1 boneless pork shoulder roast (Boston butt), 4 to 5 lbs (1.8 to 2.2 Kg), rolled
and tied
Salt and freshly ground pepper to taste
Hickory chips, soaked in water for at least 30 minutes
Season the roast with salt and pepper and cook over a low, indirect fire until
the meat is very tender and has reached an internal temperature of 190F (88C),
about 3 to 4 hours. Add hickory chips to the coals in small amounts during the
cooking. Slice, chop, or "pull" the meat into small pieces and toss with a
little bit of sauce. Serve additional sauce on the side. Serves 12 to 15.
They say that a barbecue expert can tell which North Carolina
county you live in based on the type of barbecue sauce you prefer. I don't know
if that is true, but I do know there is a fierce rivalry between the
vinegar-based and ketchup-based factions, so I have decided to give them equal
time here.
Eastern North Carolina-Style Sauce
1 1/2 cups (375 ml) cider vinegar
3 Tbs (45 ml) sugar
1 tsp (5 ml) Tabasco sauce
Crushed red pepper flakes to taste
Salt and freshly ground pepper to taste
Combine all ingredients in a saucepan and simmer for 10 minutes. Serve warm.
Makes about 1 1/2 cups (375 ml).
Western North Carolina-Style Sauce
3 Tbs (45 ml) butter
1/4 cup (60 ml) finely chopped onion
2 cups (500 ml) ketchup
1/2 cup (125 ml) firmly packed brown sugar
1/2 cup (125 ml) yellow mustard
1/2 cup (125 ml) cider vinegar
1 Tbs (15 ml) Worcestershire sauce
Tabasco sauce to taste
Heat the butter in a saucepan over moderate heat and saute the onion until
tender but not brown, about 5 minutes. Add the remaining ingredients and bring
to a boil. Reduce the heat and simmer 10 minutes. Allow to cool to room
temperature. Makes about 4 cups (1 L).
Although many people like their pork ribs coated in a sticky,
sugar-based sauce, I prefer mine cooked the way they are done in Memphis.
Memphis-Style Barbecued Ribs
For the rub:
3 Tbs (45 ml) kosher salt
3 Tbs (45 ml) whole black peppercorns
3 Tbs (45 ml) sugar
2 Tbs (30 ml) whole mustard seeds
2 Tbs (30 ml) paprika
1 Tbs (15 ml) dried oregano
2 tsp (10 ml) whole cumin seeds
2 tsp (10 ml) whole fennel seeds
2 tsp (10 ml) celery seeds
1 tsp (5 ml) dried thyme
Crushed red pepper flakes to taste
2 - 3 slabs of pork baby back or spareribs
Combine all the ingredients for the rub in a spice grinder or electric blender
and process until slightly coarse. Rub the mixture into the ribs 30 minutes
before cooking. Cook the ribs over indirect heat until the meat is very tender
and pulls back from the ends of the bones, about 2 hours. Serves 4 to 6.
Return to the
Index of Recipes.
Breaded Cutlets
This is one of the 50 Fundamental Foods that is really more about
a cooking technique than a specific dish. It's a technique used practically
everywhere, and it has spawned dishes such as Wiener Schnitzel, milanesa,
chicken cordon bleu, eggplant parmesan, and chicken-fried steak.
The technique common to all these dishes (and many more) is known as breading
(or crumbing to some of my readers) and is usually a three-step process. The
first step is to lightly coat a thinly cut portion of food in flour, followed by
a dip in beaten egg, and then coating it in a layer of bread crumbs before
cooking, usually by shallow frying. The theory behind the three-coat process is
that the flour adheres naturally to the moisture in the food, and the egg
adheres to the flour, and the final coating of bread crumbs adheres to the egg.
It is important to note here that any one or two of those steps can be omitted.
For instance, many dishes such as veal Marsala are usually just dusted lightly
with flour before cooking, and dishes called "alla Francese" in Italian cuisine
are usually coated with flour and egg, omitting the final layer of bread crumbs.
They are all variations on the same basic technique.
Note also that the food that is breaded can be just about anything. Most
incarnations of the breaded cutlet found around the world involve meats such as
veal, beef, and pork, but chicken and turkey (especially popular in Israel) are
common. Also common are non-meat alternatives including eggplant, summer
squashes, and soy-based products.
Just as the foods to be breaded can run the gamut of possibilities, so can the
breading ingredients. Just about any liquid can be used in place of the egg
layer, and the final coating of bread crumbs can be replaced with additional
flour, cracker crumbs, cornmeal, grated cheese, or panko.
Given the vast number of foods and coating ingredients, the number of possible
variations for breaded cutlets is, for all practical purposes, unlimited, so
don't hesitate to apply the basic technique given below to your own unique
combinations.
Wiener Schnitzel
2 lbs (1 Kg) leg of veal, cut into slices 1/4 inch (5 mm) thick
1/2 cup (125 ml) fresh lemon juice
Salt and freshly ground pepper to taste
1/2 cup (125 ml) flour
2 eggs, beaten with 2 Tbs (30 ml) water
1 cup (250 ml) bread crumbs
6 Tbs (90 ml) lard, butter, or vegetable oil
Lemon wedges for garnish
Combine the veal slices and lemon juice in a non-reactive bowl and marinate for
1 hour. Pat the cutlets dry and season with salt and pepper. Lightly coat the
cutlets with flour, then dip in the beaten egg and coat with bread crumbs.
Refrigerate for at least half an hour, or up to several hours. Heat the lard in
a large heavy skillet over high heat until the surface shimmers and add the
cutlets, 2 or 3 at a time. Cook 3 to 4 minutes on each side, until golden brown.
Garnish with lemon wedges and serve immediately. Serves 4 to 6.
The basic recipe for Wiener Schnitzel has many variations in addition to the use
of beef, pork, or chicken as mentioned above.
Wiener Schnitzel Variations
Cheese Schnitzel (Kaseschnitzel) - Substitute 1/2 cup (125 ml)
grated Parmesan cheese for half the bread crumbs in the recipe above.
Schnitzel a la Holstein - Prepare Wiener Schnitzel as above and
top each with a fried egg with anchovy fillets laid across the egg, and a
sprinkling of capers.
Hunter's Schnitzel (Jagerschnitzel)
2 Tbs (30 ml) lard or butter
1 onion, finely chopped
8 oz (225 g) sliced mushrooms
1 1/2 cups (375 ml) beef stock
1 tablespoon cornstarch mixed with
1/2 cup sour cream
1 recipe Wiener Schnitzel (see above)
Heat the lard in a skillet over moderate heat and saute the onion and mushrooms
until lightly browned. Add the stock and simmer for 15 minutes. Remove from the
heat and stir in the sour cream mixture. Spoon over the Wiener Schnitzels and
serve immediately.
Almond Schnitzel (Mandelschnitzel) - Substitute pulverized
blanched almonds for the bread crumbs in the recipe for Wiener Schnitzel above.
Alternately, top the Wiener Schnitzels with slivered almonds that have been
sauteed in a little butter.
Cream Schnitzel (Rahmschnitzel) - After cooking the Wiener
Schnitzels according to the recipe above, deglaze the pan with 1/2 cup (125 ml)
water. Mix together 1/2 cup (125 ml) sour cream and 1 tablespoon (15 ml)
all-purpose flour and stir this into the water. Return the Schnitzels to the
sauce and simmer covered - do not boil - for 5 to 10 minutes.
Paprika Schnitzel - Cook cream Schnitzel (above) but season the
meat with paprika before frying and add 1 or 2 teaspoons (5-10 ml) paprika to
the sauce.
Return to the
Index of Recipes.
Chicken Breasts
I chose chicken breasts to be one of my 50 Fundamental Foods for
the same reason I chose shrimp, long-grain rice, and salmon fillets: it's not
that they're difficult to cook, it's just that so many people don't know how to
cook them well. As with the other items I just named, the most common mistake
people make when cooking chicken breasts is to cook them too long. This is
easily remedied by a couple of very simple techniques.
Brining chicken breasts not only adds moisture to the meat, but it helps the
meat to hold onto the moisture as well. The saltwater causes the proteins in the
meat to undergo a process called denaturing. When protein molecules become
denatured they relax and begin to unwind from the tight little balls they used
to be. In unwinding they become interwoven with the other protein molecules that
surround them, forming a mesh of molecules that trap water in the spaces between
them. This explains why it is much harder to overcook brined meats to the point
where they become dry and flavorless.
Whether you brine or not, chicken breasts only take a few minutes to cook. A
quick browning on both sides in a hot skillet, or a short time in a hot oven is
all it takes to cook them. Some recipes call for browning and then roasting or
braising for a total of 30 or 45 minutes or more. Ignore those instructions.
Three or four minutes per side in a skillet, or no more than 15 minutes in a hot
oven is all it takes to cook chicken breasts.
I always recommend using boneless chicken breasts (I think the notion of the
bones adding flavor to the meat is just an old wives' tale). Remove the skin if
you prefer, but I like the flavor it adds (remember: fat equals flavor). The
chicken breasts are done when they are firm to the touch, and when a small
incision made with the tip of a knife reveals the center of the breast is no
longer pink. To be absolutely sure until you get the hang of cooking them, test
them with an instant-read thermometer - you want them to be 160F (70C) in the
thickest part.
Brining Chicken Breasts
3/4 cup (180 ml) kosher salt, or 6 Tbs (90 ml) table salt
3/4 cup (180 ml) sugar (optional)
1 quart (1 L) cold tap water
4-6 chicken breast halves, skinless and/or boneless if desired
Dissolve the salt and optional sugar in the water in a 1-gallon (4 L) sealable
plastic bag. Add the chicken, press out as much air as possible, seal, and
refrigerate for 1 1/2 hours. (Brining the chicken for more than 2 hours will
result in an unpleasant mushy texture.) Remove from the brine, rinse well, and
pat dry with paper towels. Season as desired, but keep in mind that the meat is
already salted and probably won't require additional salt.
You may substitute almonds or even pecans for the hazelnuts in this recipe, but
don't omit the fresh chives - they give the dish a unique flavor and aroma.
Chicken Breasts with Hazelnuts and Chives
4 - 6 skinless, boneless chicken breast halves
1/4 - 1/3 cup (60 - 80 ml) chopped fresh chives
Salt and freshly ground pepper to taste
3 Tbs (45 ml) hazelnut or vegetable oil
1/2 cup (125 ml) chopped hazelnuts (filberts)
2 Tbs (30 ml) lemon juice
Coat the chicken breasts with half the chives and season with salt and pepper.
Heat the oil in a large skillet over moderate heat and brown the chicken breast
2 minutes on each side. Cover the skillet and reduce the heat to very low. Cook
an additional 5 minutes - the breasts should be done but still tender and moist.
Remove the breasts to a warm plate and add the chopped hazelnuts, stirring for 1
or 2 minutes until they are aromatic and golden brown. Add the lemon juice,
season with salt and pepper, and spoon over the chicken. Garnish with the
remaining chives. Serves 4 to 6.
Use this recipe as your basic guide to poaching chicken breasts, and then go
ahead and do anything you want with them.
Cold Poached Chicken Breasts with Watercress Sauce
1 medium onion, peeled and sliced
2 garlic cloves, crushed
1 sprig fresh rosemary, or 1 Tbs (15 ml) dried
4 - 6 skinless, boneless chicken breast halves
1 1/2 cups (375 ml) chopped watercress*
1 1/2 cups (375 ml) plain yogurt
1 shallot, chopped
Salt and freshly ground pepper to taste
*You can substitute spinach, basil, parsley, arugula, sorrel, or any combination
of these.
Combine the onion, garlic, and the rosemary in a saucepan along with enough
water to cover the chicken breasts, and bring to a boil. Simmer over low heat
for 5 minutes, then add the chicken breasts. Simmer for 5 minutes, then remove
from the heat. Allow to sit in the poaching liquid for 10 minutes, then place
the pan in the refrigerator, complete with the poaching liquid. Allow to chill
for 2 to 3 hours.
For the sauce, combine the watercress, yogurt, shallot, salt, and pepper in a
food processor or electric blender and puree until smooth. To serve, remove the
breasts from the poaching liquid and drain on paper towels. Place a dollop of
the sauce on top of each breast, and put the rest of the sauce in a bowl for
diners to serve themselves. Serves 4 to 6.
Return to the
Index of Recipes.
Fried Chicken
I don't know why this dish is associated with the American South
because it probably originated in Scotland, and certainly passed through New
England and the Mid-Atlantic states before landing in Dixie. Regardless of the
questionable attribution, it is one of my favorite dishes, and I know I'm not
alone. That is enough to make it one of my 50 Fundamental Foods.
There are as many recipes for fried chicken as there are cooks. Some insist the
chicken be marinated in buttermilk prior to coating. Others have a secret blend
of seasonings that makes their chicken stand out. My recipe is basic, and should
be "do-able" almost anywhere you live. You may substitute vegetable shortening
or vegetable oil for the lard, but you won't get an authentic flavor or texture,
and if you are on a fat-restricted diet you had best skip this recipe.
Southern Fried Chicken
A 2 1/2 to 3 lb (1300 to 1500 g) chicken, cut into 8 serving pieces
Salt and freshly ground pepper to taste
1 cup (250 ml) plus 2 Tbs (30 ml) all-purpose flour
1 1/2 to 2 lbs (700 to 900 g) lard
Pat the chicken pieces completely dry with paper towels and sprinkle on all
sides with salt and pepper. Dip the chicken pieces in 1 cup of flour, one at a
time, and shake off all the excess. Melt 1 1/2 lbs (700 g) of the lard in a
large, heavy skillet at least 2 inches (5 cm) deep with a tightly fitting lid.
The melted lard should be about 1/2 inch (1.25 cm) deep; add more lard if
necessary. When the lard is very hot but not smoking place the chicken pieces in
the lard, skin side down, and cover. Fry over high heat for 5 minutes. Turn the
pieces of chicken with tongs and continue to fry covered for an additional 4 to
5 minutes, until the chicken is evenly browned on both sides. Remove the chicken
to a large shallow baking dish which is lined with paper towels and place in an
oven set at the lowest setting to keep warm. Serves 4 to 6.
Return to the
Index of Recipes.
Hamburgers
With so many options regarding the choice of meat, toppings,
condiments, and breads, it is possible to eat a hamburger every day of your life
and never eat the same hamburger twice. That (along with the fact that I'm a
flag-waving red-blooded American) makes hamburgers one of my 50 Fundamental
Foods.
While beef is considered the "standard" for hamburgers (many Americans even call
ground beef "hamburger"), any ground meat can be used. Popular cuts of beef
include round, chuck, and sirloin, and those are the cuts you're most likely to
find pre-ground in the supermarket. Other cuts that make tasty burgers include
brisket, short ribs, flank steak, skirt steak, and ribeye. (Avoid the stuff
labeled "hamburger" because it's usually scraps.) And don't forget that pork,
lamb, chicken, and turkey make great burgers too.
Toppings can consist of just about anything you like, and my favorite is cheese.
Use any cheese that you like - I like them all. My favorites include gruyere
(Swiss), blue, cheddar, and brie. Other topping that you'll find on most
hamburgers include lettuce, tomato, and onion, but don't limit yourself to
those. Pickles and sauteed mushrooms are favorite additions, and crisp bacon
makes every burger better. Some people enjoy toppings like cole slaw, pickled
jalapeño peppers, and fried eggs. In other words, if it's something you like, it
will probably taste good on a burger.
The range of condiments is equally broad. Mustard, ketchup, and mayonnaise form
the triumvirate, but just about any flavorful liquid can be dribbled on a
hamburger. Consider steak sauce, chile sauce, barbecue sauce, Asian soy sauce or
fish sauce, or the hot sauce of your choice. Don't forget salad dressings,
pesto, pickle relish, horseradish sauce, hoisin sauce, fresh salsa, guacamole,
and Worcestershire sauce too.
When it comes to the bread, I think the flavorless things sold as hamburger buns
are among your worst options. Consider using kaiser rolls or onion rolls
instead. English muffins, ciabatta, and sandwich breads are all good choices.
One of the best hamburgers I have ever eaten (at Louis' Lunch in New Haven,
Connecticut) was served on toasted white bread, which has since become my
mother's favorite way to eat a hamburger because she doesn't fill up on bread.
Regardless of the bread you choose, it will be better if it is toasted or
grilled immediately before the meat patty is added.
The meat patty itself should be between 4 and 8 ounces (110 - 220 g). Any
smaller and you might as well be eating at a fast-food joint, and any bigger
gets a bit tricky to eat. Form the meat into a patty, handling it as little as
possible. Make the patties a bit larger than the rolls you will be putting them
on because they will shrink when you cook them. The patties also have a tendency
to get thicker in the center, so make them slightly concave in the middle to
counteract this. Some people like to bury a pat of butter or some ice chips in
the meat to help keep it moist, but I have never found either of those tactics
necessary.
You can cook the patties any way you like. Grilling over hot coals is probably
everyone's favorite method, but there are several options available if a roaring
fire isn't handy. Cooking them under a hot broiler gives the patties a flavor
similar to grilling, and some people prefer the griddle-style flavor they get
from sauteing in a heavy skillet over high heat. Heck, there are even places
that have made their reputation on burgers by steaming them, so cook them
however you like. Just be sure to cook them to 160F (70C) because food poisoning
from contaminated ground meats is a very real danger.
Here is a version that will wake up the taste buds and remind you that there can
be more to burgers than plain ground beef.
Thai Burgers
1 1/2 - 2 lbs (675 - 900 g) lean ground chuck or sirloin
1/4 cup (60 ml) finely chopped fresh cilantro (coriander leaves)
2 Tbs (30 ml) finely chopped fresh mint
1 Tbs (15 ml) lime juice
1 Tbs (15 ml) finely chopped jalapeño pepper, or to taste
1 Tbs (15 ml) finely chopped garlic
1 tsp (5 ml) grated lime zest
1 tsp (5 ml) grated ginger
Salt and freshly ground pepper to taste
Combine all the ingredients in a mixing bowl and mix thoroughly with your hands.
Form gently into 4 to 6 patties and grill over hot coals, pan-fry, or broil to
an internal temperature of 160F (70C), turning once halfway through cooking.
Serve the burgers on toasted buns. Serves 4 to 6.
A couple of canned products from the Mexican section of your
supermarket make these Southwestern-style burgers a cinch to make.
Tex-Mex Burgers
1-1 1/2 lbs (450-675 g) ground beef, preferably chuck
1 canned chipotle chile in adobo, chopped, or to taste
1/2 cup (125 ml) shredded Monterey Jack or other mild cheese
1/4 cup (60 ml) canned roasted green chili peppers
1/4 cup (60 ml) finely chopped onion
1/4 cup (60 ml) chopped cilantro (coriander leaves) (optional)
1 tsp (5 ml) chili powder
1/2 tsp (2 ml) ground cumin
Salt and freshly ground pepper to taste
Combine all the ingredients in a mixing bowl and mix thoroughly with your hands.
Form gently into 4 to 6 patties and grill over hot coals, pan-fry, or broil to
an internal temperature of 160F (70C), turning once halfway through cooking.
Serve the burgers on toasted buns. Serves 4 to 6.
Return to the
Index of Recipes.
Kebabs
Putting a piece of meat on a stick and holding it over a fire may
be oldest method of cooking other than simply tossing a piece of meat directly
onto hot coals. The advantages of skewering the meat are as numerous as they are
obvious, and this combination of antiquity and practicality makes kebabs one of
my 50 Fundamental Foods.
Call them kebabs, kebobs, kabobs, brochettes, skewers, satays, or whatever word
you choose, meat and vegetables cooked on sticks of wood or metal exist in every
culinary culture. The technique hasn't changed for tens of thousands of years,
but there are a few things modern cooks can do to make their kebabs the best on
the block.
Many recipes will have you thread a number of different items on a skewer to be
cooked at the same time. This is a mistake because different foods cook at
different rates. Separate your meats from your vegetables by making skewers
composed of only one ingredient, and cook each to perfection. If you are cooking
more than one kind of meat, put them on individual skewers as well.
Put a slice of bacon between pieces of meat only if you like your bacon raw. And
any gaucho worth his (or her) salt will tell you that you must leave a space
between pieces of meat so that they can cook properly on all sides.
Finally, anyone who has ever tried to turn kebabs on a hot grill has experienced
the phenomenon where the skewer turns, but the food on the skewer doesn't. I
don't know how many millennia it took ancient cooks to discover that threading
the meat on a pair of skewers held in parallel fashion takes care of this
problem, but I'll bet it wasn't many.
Add the flavors of Southeast Asia to your next backyard cookout with these
exotic yet simple kebabs.
Vietnamese-Style Beef Kebabs
For the marinade:
1/4 cup (60 ml) lime juice
2 Tbs (30 ml) soy sauce
2 Tbs (30 ml) sesame oil
2 Tbs (30 ml) chopped fresh basil
2 Tbs (30 ml) chopped fresh mint
1 Tbs (15 ml) Asian fish sauce (optional)
1 Tbs (15 ml) grated ginger
1 Tbs (15 ml) sugar
1 Tbs (15 ml) finely chopped garlic
1 tsp (5 ml) hot red pepper flakes, or to taste
2 lbs (900 g) top sirloin steak, cut into 1-inch (3 cm) cubes
10 - 12 scallions (spring onions), white part only, cut into 1-inch (3 cm)
pieces
Whisk together the marinade ingredients and marinate the meat for 2 to 4 hours.
Thread the meat onto skewers, alternating with pieces of scallion. Grill
directly over hot coals until meat is medium rare, 8 to 10 minutes, turning
once. Serves 4 to 6.
Assemble these tidbits a day or two in advance and grill or broil
them just before serving.
Shrimp and Prosciutto Skewers
2 lbs (900 g) large shrimp (about 30), tails on, peeled and deveined
1/2 cup (125 ml) Pernod, ouzo, or other anise-flavored liqueur
1/4 cup (60 ml) olive oil
2 Tbs (30 ml) chopped fresh rosemary
Salt and freshly ground pepper to taste
10 paper-thin slices of prosciutto ham
Combine the shrimp, Pernod, olive oil, rosemary, salt, and pepper in a bowl and
toss to combine well. Marinate refrigerated for 1 hour. Cut each slice of
prosciutto lengthwise into three strips. Wrap a piece of prosciutto snugly
around each shrimp and skewer through the head and tail, using wooden skewers or
long toothpicks. Cook over hot coals or place on a baking sheet and cook under a
preheated broiler until the ham is crispy and the shrimp are opaque, about 1 to
2 minutes per side. Serve warm. Makes 30 skewers, to serve 6 to 8.
Return to the
Index of Recipes.
Leg of Lamb
Leg of lamb is among the dishes I chose for the list of 50
Fundamental Foods for a couple of reasons. It is an expensive cut of meat, and
for that reason when we cook it for a special occasion we really want to get it
right. It can be an intimidating dish to cook for the simple reason that most
people don't cook it very often. And lastly, many Americans eat it so
infrequently that many of us have never developed a true appreciation for this
delicious meat.
A leg of lamb is somewhat unique among the large cuts (or "joints" as the
British would say) in that it can either be served medium-rare, like a beef rib
roast, or it can be cooked low and slow until it's falling off the bone, like a
barbecued shoulder of pork. Either way it is always a special treat in my house,
and I have provided a recipe for both styles of cooking.
If you like your leg of lamb cooked to medium-rare, then I recommend this
method.
Leg of Lamb with Pan Gravy
3 lbs (1.5 Kg) or more leg of lamb
5 to 8 cloves of garlic, cut into slivers
15 to 20 1 inch (2 cm) pieces of parsley stem
Salt and freshly ground black pepper to taste
Juice of 1 lemon
4 to 6 Tbs (60 to 90 ml) melted butter
3 Tbs (45 ml) flour
For the gravy:
1 cup (250 ml) water
2 Tbs (30 ml) butter
2 Tbs (30 ml) flour
Rinse and dry the leg of lamb. Make a few cuts in the meat using the point of a
sharp knife and stuff some garlic and parsley stems into each cut. Rub the lemon
juice into the meat and season generously with salt and pepper. Sprinkle the
flour over the surface of the meat. Roast in a preheated 350F (180C) oven for
about 30 minutes per pound (1 hour per kilogram), or until it reaches an
internal temperature of 135F (57C) for medium-rare to 160 (70C) for well-done.
Remove from the pan and allow the roast to cool for 15 minutes before slicing
and arranging the meat on a serving platter.
Meanwhile, pour off and discard the fat from the roasting pan and add the water,
stirring to scrape up all the baked on "brown bits" in the bottom of the pan. In
a small saucepan melt the butter over moderate heat and add the flour, stirring
constantly until it turns light brown. Add the flour mixture to the water in the
roasting pan, stirring it over low heat until the gravy has thickened. Adjust
the seasoning with salt and pepper, pour into a gravy boat, and serve with the
meat. Serves 6 to 8, or more depending on the size of the roast.
This method of cooking leg of lamb will be preferred by people
who like their lamb well-done.
Leg of Lamb with Beans
1 leg of lamb, about 4 lbs (1.8 Kg)
6-8 cloves garlic, cut into 3 or 4 pieces
2 Tbs (30 ml) olive oil
1 lb (450 g) spinach leaves
2 cans (15 oz, 425 g each) cannellini, flageolet, or white navy beans, drained
2 sprigs fresh rosemary
2-3 Tbs (30-45 ml) whole green peppercorns
Salt and freshly ground pepper to taste
Cut small slits into the leg of lamb and insert a piece of garlic in each. Heat
the oil in a large baking dish big enough to hold the leg of lamb. Saute the
spinach until wilted. Add the remaining ingredients and place the leg of lamb on
top of them. Bake tightly covered in a 300F (150C) oven until the lamb is tender
and has shrunk, exposing the end of the bone, 3 to 4 hours. Discard the rosemary
sprigs, slice the lamb and serve it with the bean and spinach mixture. Serves 6
to 8.
Return to the
Index of Recipes.
Lobster
Lobster is an unusual food from several perspectives. There are
very few foods that people of ordinary means are willing to spend $20 or $30 or
even more for a single serving, and there are very few such luxurious items that
are cooked by being unceremoniously dropped into a pot of boiling water.
Regardless of your financial situation, whole Maine lobsters are a special
occasion treat, and for this reason every serious cook needs to know how to
properly prepare and serve them. You won't do it often, but when you do, you
want to do it right.
When buying a lobster be sure to squeeze it to determine the
hardness of the shell. When grasped on either side of its body with your thumb
and forefinger, the shell should feel rigid and unpliable when squeezed. If it
is soft and yielding, that means the lobster has recently molted. While there is
nothing wrong with so-called "shedders" (in fact, some people think their meat
is sweeter), it does mean that the lobster's body hasn't grown to fully fill the
new shell, so there won't be as much meat in a lobster with a soft shell.
I prefer steaming to other methods of cooking because it retains
the purest essence of the lobster without filling the shell with water. If
you're squeamish about killing your own food, maybe you had better steer clear
of this recipe even though I give instructions to minimize the discomfort of the
animal. I recommend lobsters of at least 1 1/4 pounds (560 g) because about half
the weight is in the shell, and this is one of those cases where bigger truly is
better if you're a lobster lover. If you've never eaten a whole lobster before,
I recommend the illustrated instructions at
this website.
Steamed Lobster
4-6 live lobsters, at least 1 1/4 lbs (560 g) each
1/4 lb (110 g) butter, melted
2-3 Tbs (30-45 ml) lemon juice
Lemon wedges for garnish
Place the lobsters in the freezer for about 10 minutes to numb
them - some people prefer to kill them by splitting the head between the eyes
with a sharp knife before placing them in the pot. Put about 1 inch (3 cm) of
salted water in a large pot - use clean seawater if you have access to it. Bring
the water to a boil and add the lobsters. Return to the boil and simmer tightly
covered until done: 10 minutes for 1 lb lobsters; 13 minutes for 1 1/4 lb
lobsters; 15 minutes for 1 1/2 lb lobsters; 18 minutes for 2 lb lobsters. The
lobsters are done when they're bright red in color and when the antennae can be
removed with a sharp tug. If in doubt, tear one of the tails from the lobster -
it is done if the exposed flesh is opaque with no translucency. Meanwhile,
combine the melted butter and lemon juice and place into small bowls. Transfer
the lobsters to serving plates and serve with lemon butter and lemon wedges.
Serves 4 to 6.
Return to the
Index of Recipes.
Meatloaf
If you're looking for a classic American dish that is economical,
easy to make, and loved by practically everyone, I don't think you could do much
better than meatloaf. It's one of those dishes that everyone's mother added her
special touch to, whether it was dousing it with ketchup or topping it with
strips of bacon, or any of thousands of creative embellishments that have been
conceived over the decades.
Here is a basic recipe that I hope you will customize with the addition of any
seasoning or ingredient that strikes your fancy.
Classic Meatloaf
1 1/2 lbs (675 g) ground beef
3 eggs, lightly beaten
1 medium onion, finely chopped
1 cup (250 ml) bread crumbs
1/2 cup (125 ml) ketchup
2 Tbs (30 ml) Dijon mustard
1/2 cup (125 ml) chopped fresh parsley
1 Tbs (15 ml) fennel seed
1 tsp (5 ml) dried thyme, marjoram, or oregano
Salt and freshly ground pepper to taste
Combine all the ingredients in a mixing bowl and knead the mixture with your
hands until thoroughly combined. Transfer the mixture to a 9x5x3-inch (23x13x8
cm) loaf pan or form into a loaf on a baking sheet. Bake in a preheated 350F
(180C) oven until the center of the loaf reads 160F (70C) on an instant-read
thermometer, about 1 to 1 1/4 hours. Drain off the excess fat and let stand for
15 minutes before cutting into slices. Serves 4 to 6.
Return to the
Index of Recipes.
Pork Chops
When it comes to my list of 50 Fundamental Foods, I pretty much
stick to conventional wisdom regarding their preparation. I have a hearty
respect for age-old techniques and recipes, and even my enormous ego can't
persuade me that I'll ever be the discoverer of some new and exciting method of
cooking a common food. As far as I am concerned, classic techniques usually
trump newfangled notions, and this is true in cooking as well as many other
fields of human endeavor.
On the subject of pork chops, however, I have to differ with the prevalent
thinking regarding their preparation. Most traditional recipes suggest buying
pork chops that are about an inch thick, and then go to great lengths to cook
them in such a manner that they don't wind up dry, tough, and tasteless. I don't
believe I have ever cooked or eaten a thick-cut pork chop that wasn't dry,
tough, and tasteless. Some food writers suggest that this is because the pork
that is commercially raised nowadays is inherently inferior to the product of
yesteryear, pointing out that it isn't nearly as fatty as is used to be. This
may be true and I won't dispute it. What I will do is point out that it really
doesn't matter what the reason is as long as thick pork chops turn out dry,
tough, and tasteless, regardless of how they are cooked.
My solution to this situation is simple: buy thinly cut pork chops. The last
pork chops I bought were actually labeled "wafer thin." I cooked them under the
broiler because I didn't feel like firing up the backyard grill that night,
seasoned only with a little lemon pepper. They only took about two minutes per
side to cook, and they were juicy, tender, and delicious.
The thinly cut pork chops that I am recommending you buy can be cooked by most
of the traditional methods with great success, as long as you don't over cook
them. Remind yourself that trichinosis is something we don't need to worry about
anymore unless we are eating wild boar or slaughtering our own pigs. The pork on
the market these days is free of the trichinosis worms and can very safely be
eaten in a less than cooked-to-death state. I prefer my pork chops a little bit
pink in the center, what would be called "medium-well" if it were a beef steak.
Broiling, grilling, and pan frying are the best ways to cook thinly cut pork
chops, but braising won't work - you'll get the same dry, tough, and tasteless
results if you insist on cooking them for more than a few minutes.
My final word on cooking pork chops is this: buy pork chops that are no thicker
than 1/2 inch (1.25 cm), and thinner is better than thicker. Cook them quickly
and don't be afraid to leave them slightly pink in the center. Follow these two
simple rules and you'll never cook a bad pork chop again.
"Salmoriglio" refers to a strong, fragrant sauce from Sicily, which is also
great on chicken, lamb, beef, and fish.
Pork Chops Salmoriglio
1/2 cup (125 ml) extra-virgin olive oil
2 Tbs (30 ml) finely chopped fresh oregano
2 Tbs (30 ml) finely chopped fresh thyme
2 Tbs (30 ml) lemon juice
1 Tbs (15 ml) grated lemon zest
Salt and freshly ground pepper to taste
8 - 12 pork chops, about 1/4 inch (8 mm) thick
Combine the oil, herbs, juice, zest, salt, and pepper in an electric blender or
food processor and process until the sauce is emulsified. Season the pork chops
with salt and pepper and grill or broil until done, about 2 to 3minutes per
side. Spoon the sauce over the chops, or serve it on the side for diners to help
themselves. Serves 4 to 6.
Return to the
Index of Recipes.
Pot Roast
I am a huge fan of pot roasts for several reasons. Like many
dishes that are slowly braised, it is actually better if a tough cut of meat is
used. Cuts of meat that would otherwise be nearly inedible are turned into rich,
unctuous dishes when the tough connective tissue they contain is turned into
gelatin by the "long and low" cooking process. The ability to make a delicious
dish from an inexpensive cut of meat alone is enough to earn it a place on my
list of 50 Fundamental Foods.
Added virtues include the flexibility of the dish. Just about any liquid can be
used to braise the roast, and just about any vegetables that you have on hand
can be added. And you don't need to be an award-winning cook to make a
world-class pot roast as long as you cook it long enough and don't let the pot
boil dry. It's as foolproof a dish as you'll find anywhere.
Finally, it's comfort food of the highest order, and it's delicious. Are those
enough reasons to include it here?
Old-Fashioned Pot Roast
2 Tbs (30 ml) vegetable oil
3 to 4 lb (1.5 to 2 Kg) beef chuck, shoulder, round, or rump roast
2 to 3 carrots, cut into 2 inch (5 cm) pieces
2 to 3 ribs celery, cut into 1 inch (2 cm) pieces
2 to 3 small turnips, peeled and quartered
4 to 6 small potatoes, peeled (optional) and quartered
1 medium onion, stuck with 3 cloves
6 to 10 whole cloves of garlic, peeled
2 bay (laurel) leaves
2 cups (500 ml) beef stock or red wine, or
combination of the two
Salt and freshly ground pepper to taste
Heat the oil in a large, heavy pot over high heat and lightly brown the roast on
all sides. Add the remaining ingredients and bake covered in a 300F (150C) oven
for 3 to 4 hours, or until meat is tender. You may also simmer it covered on the
stove over low heat for 3 to 4 hours. Under either method, check the pot
occasionally and add more liquid if necessary. Remove the meat when it is done
and cut into thick slices. Arrange the sliced meat on a serving platter or
individual plates and add the vegetables. Discard the onion and bay leaves. Skim
the excess fat off and ladle the remaining liquid over the meat and vegetables.
Serves 4 to 6.
Return to the
Index of Recipes.
Rib Roast of Beef
Roast beef is among my 50 Fundamental Foods for the same reasons
that lobster and leg of lamb are: they are all special-occasion foods that are
just too darned expensive to get wrong. A properly cooked rib roast of beef is
truly one of the world's greatest gastronomic delights.
Known generically in the United States as "prime rib" regardless of whether the
grade of meat is actually USDA Prime or not (it usually isn't), a rib roast of
beef can contain anywhere from two to seven ribs. Roasts in the range of two to
four ribs are most common.
This cut of meat has been intimidating cooks for generations, until Craig
Claiborne, the long-time food editor and restaurant critic for the New York
Times, published a recipe he attributed to food writer Anne Seranne on July 28,
1966. The "put it in the oven and forget about it" approach gained cult status
in subsequent years, and it remains a reliable and worry-free recipe almost 50
years later.
Rib Roast of Beef with Horseradish Sauce
A 2- to 4-rib roast of beef weighing 4 1/2 to 12 lbs (2 - 5.5 Kg)
Salt and freshly ground pepper to taste
All-purpose flour
For best results, age the beef for 4 to 7 days. Unwrap the roast, dry it
thoroughly with paper towels, and place it on a wire rack set over a pan lined
with paper towels. Refrigerate uncovered for 4 to 7 days. Before cooking, trim
off any parts that are completely dehydrated.
Whether you age the beef or not, allow the roast to sit at room temperature for
3 to 4 hours before cooking. Preheat the oven to 500F (260C). Place the roast,
fatty side up, in a shallow roasting pan, season liberally with salt and pepper,
and sprinkle with flour (this will make a lovely crust). Put the roast into the
preheated oven and roast according to the following chart:
2 ribs (4 1/2 to 5 lbs) 25-30 minutes
3 ribs (8 to 9 lbs) 40-45 minutes
4 ribs (11-12 lbs) 55-60 minutes
When cooking time is finished, turn off the oven. Do not open the door of the
oven until it is lukewarm, about 2 hours. The roast will remain warm for up to 2
hours after you remove it from the oven. Reserve the pan drippings to make
Yorkshire pudding (see below).
To carve, stand the roast up so the bones are pointing upward. Slide a long
carving knife along the ribs to separate the meat from the bones. Place cut-side
down and cut across the grain into thick slices. Makes about 2 servings per rib.
Horseradish Sauce
1 cup (250 ml) sour cream
3 Tbs (45 ml) prepared horseradish, or to taste
1 Tbs (15 ml) Dijon-style mustard
Salt and freshly ground pepper to taste
Combine all ingredients and refrigerate at least 1 hour before serving. Makes
about 1 1/4 cups (310 ml).
This is the classic accompaniment to roast beef in the British
Isles, and you'll never, ever find one without the other in my house.
Yorkshire Pudding
2 eggs
1 cup (250 ml) all-purpose flour
1 cup (250 ml) milk
1/2 tsp (2 ml) salt
2 Tbs (30 ml) beef drippings
Combine the egg, flour, milk, and salt in an electric blender. Process at high
speed for 2 to 3 seconds. Turn off the machine and scrape down the sides of the
jar. Blend for 40 seconds. To make by hand, beat the eggs and salt until frothy.
Beat in the flour gradually, followed by the milk. Refrigerate for at least 1
hour. Heat the beef drippings in a large roasting pan (you may use the one the
roast was cooked in after removing the rest of the drippings) over moderate heat
until the drippings are hot and begin to bubble. Beat the batter briefly and
pour into the hot roasting pan. Place in a preheated 375F (190C) oven and bake
for about 30 minutes, until the batter is crisp and brown and has risen up the
sides of the pan. Cut the pudding into squares and serve immediately. Serves 6
to 8.
Return to the
Index of Recipes.
Roast Chicken
Producing the perfectly roasted chicken is a challenge to any
cook. The breast meat tends to dry out while the thighs tend to be under-cooked,
and the skin can be variously soft, gummy, dry, or tasteless. Temperature
regulation and turning the chicken are both critical factors in this simple
recipe. If you don't have a V-rack, use a couple of wads of crumpled aluminum
foil to prop up the bird.
Basic Roast Chicken
1 whole chicken (about 3 lbs, 1.35 Kg), rinsed and patted dry with paper towels
2 Tbs (30 ml) melted butter or olive oil
Salt and freshly ground pepper to taste
Place a shallow roasting pan in the oven while it preheats to 375F (190C). Brush
the chicken with the butter and season liberally, inside and out, with salt and
pepper. Remove the hot roasting pan from the oven and place a V-rack or plain
wire rack in the bottom. Place the chicken on the rack on its side so that one
wing is pointing up, and roast for 15 minutes. Turn the chicken to the other
side and roast 15 minutes. Turn the chicken on its back (breast side up) and
turn the oven to 450F (230C). Roast until an instant-read thermometer registers
160F (71C) in the breast and 165 (73C) in the thigh, about 20 to 25 minutes.
Transfer to a cutting board and let rest for 10 minutes before carving. Serves 4
to 6.
Return to the
Index of Recipes.
Salmon Fillets
Unlike many of the dishes in my list of 50 Fundamental Foods that
were included because they are tricky or difficult to prepare, salmon fillets
are a cinch to cook properly. The trouble is, not many people know how to do it.
The only real trick to cooking salmon fillets is to not over cook them. I have
been served salmon fillets in restaurants of every category that were dry and
tasteless, but would have been moist and delicious if only they hadn't been
cooked to death.
One thing to remember when cooking salmon is that it doesn't need to be cooked
completely. I like mine cooked the way a medium-well beef steak is cooked, still
slightly underdone in the center. But even if you don't like your salmon cooked
that way, it should be cooked just until well-done and not overdone.
Another thing to remember when cooking salmon (or any other fish, for that
matter) is that the proteins in fish respond to heat differently than the
proteins in land animals. Since the muscles of fish thrive in waters that are
much colder than temperatures on land, the chemical changes that take place in
cooking occur at lower temperatures in fish than in land animals. In other
words, fish cook at lower temperatures than beef, chicken, and pork do, so they
need to be cooked differently.
If you treat a salmon fillet like you would a steak or pork chop, you will wind
up with a dry, flavorless piece of salmon for your reward. The typical salmon
fillet is usually no thicker than about 1 inch (2.5 cm) and regardless of the
cooking method used, they should never take more than 10 to 12 minutes to cook.
Here are two different methods to cook salmon fillets that I hope you will try.
Poached Salmon in Tomato Broth
4 medium tomatoes, peeled and seeded*
1/4 cup (60 ml) white wine or chicken stock
2 Tbs (30 ml) butter
1 tsp (5 ml) fennel seeds
4-6 salmon fillets about 6 oz (170 g) each
1/2 cup (125 ml) chopped fresh basil
Salt and freshly ground pepper to taste
* To peel and seed tomatoes: Make a small x-shaped incision in the bottom of the
tomato using a sharp paring knife. Plunge the tomatoes into boiling water for 10
seconds. Rinse under cold water to stop the cooking. The peel should slide off
easily. Cut the tomatoes in half and squeeze the seeds out, using your fingers
or a small spoon to scoop them out if necessary.
Puree the tomatoes in an electric blender or food processor. Combine the pureed
tomatoes, wine or broth, butter, and fennel seeds in a large skillet over
moderate heat. Place the salmon fillets on top and sprinkle with the chopped
basil. Season with salt and pepper and simmer covered for 10 minutes. Serves 4
to 6.
Fish recipes don't get much simpler than this. You can use this
technique with any fish fillet, and remember that the skin gives added flavor.
Salmon Teriyaki
1 Tbs (15 ml) sesame oil
4-6 salmon fillets about 6 oz (170 g) each
1/4 cup (60 ml) prepared teriyaki sauce
2-3 tsp (10-15 ml) sesame seeds
Lemon wedges for garnish
Heat the sesame oil in a large, heavy skillet (preferably non-stick) until it
begins to smoke. Place the salmon fillets in the oil skin side down and remove
from the heat immediately. Spoon or brush the teriyaki sauce over the fillets,
sprinkle with sesame seeds, and place the skillet in a preheated 350F (180C)
oven. Bake for 10 to 12 minutes, until the salmon is firm to the touch. Serve
immediately, garnished with lemon wedges. Serves 4 to 6.
Return to the
Index of Recipes.
Shrimp
I believe I have had more poorly cooked shrimp than any other
food, and that alone is enough to get it a place on my list of 50 Fundamental
Foods. The most common mistake people make in cooking shrimp is to overcook it,
and I dare say that there are probably people who have never eaten a properly
cooked shrimp in their lives.
Here's a mnemonic device to help you remember how to cook shrimp: C stands for
cooked; O stands for overcooked. In other words, if you have cooked the shrimp
until it tightens up and curls so much that the two ends meet to form a circle,
you have overcooked the shrimp. If the shrimp is pink and firm to the touch and
still in the shape of a C, it is properly cooked. Now that we have the
overcooking problem out of the way, let's talk a little about buying and brining
shrimp.
Unless you literally live within a couple of miles of a fleet of shrimp boats,
the shrimp in your market has almost definitely been frozen. Most of the "fresh"
shrimp sold in supermarkets is nothing but frozen shrimp that has been thawed.
When in doubt, ask the seafood clerk - I doubt they'll lie about it. So your
best bet is to buy frozen shrimp and thaw it (in the refrigerator, never at room
temperature) just before you cook it. And be sure to check the status of various
types of shrimp at
Seafood Watch to make sure you are making the most planet-friendly choices.
Brining shrimp isn't absolutely necessary, but it does help the shrimp stay
moist and plump even if it is slightly overcooked. To brine up to about 2 pounds
(1 Kg) of shrimp, dissolve 1/4 cup (60 ml) kosher salt or 2 tablespoons (30 ml)
table salt in 3 cups (750 ml) water. Combine with the shrimp in a bowl or
plastic bag and let sit in the refrigerator for 20 minutes.
This dish is elegant in both its flavor and its simplicity, and its appeal is
further enhanced by the fact that the first ingredient is everyone's favorite
oxymoron.
Broiled Shrimp with Lemon Butter
1 1/2 to 2 lbs (750 g to 1 Kg) jumbo shrimp, peeled and deveined
2 Tbs (30 ml) coarsely crumbled hot pepper flakes
3 to 4 cloves garlic, peeled and coarsely chopped
1 cup (250 ml) peanut or vegetable oil
1 tsp (5 ml) salt
8 Tbs (100 g) unsalted butter
1/4 cup strained fresh lemon juice
Rinse the peeled and deveined shrimp and pat completely dry with paper towels.
Combine the pepper flakes, garlic, oil, and salt in an electric blender or food
processor and process until the seasonings are pulverized. Combine the marinade
and the shrimp in a bowl, and toss to thoroughly cover the shrimp. Marinate at
room temperature for 2 hours, or in the refrigerator for at least 4 hours. Cook
the shrimp over charcoal or under the broiler, turning them over once, until
they are pink and firm to the touch. Meanwhile, melt the butter in a saucepan
over moderate heat stir in the lemon juice. Place the cooked shrimp on a serving
platter and pour the lemon butter over them, or you may prepare individual
servings and serve the lemon butter in small bowls on the side. Serve at once.
Serves 4 to 6.
Return to the
Index of Recipes.
Stews
When I was in college I made a large pot of beef stew at least
once a week and invited friends over to share it with me. They appreciated a
home-cooked meal, and I appreciated their company. Beef stew with a healthy
portion of potatoes, carrots, and other inexpensive vegetables was about the
only thing I could afford to fill up a bunch of hungry college students. Stews
are economical one-dish meals that make the best use of just about any foods
that are available, and that's why I have included them among my 50 Fundamental
Foods.
Even dictionaries have a hard time distinguishing between soups and stews,
noting that they are both types of dishes in which meats and/or vegetables are
cooked in liquid, and I'm not going to attempt to settle the matter here. I
think it is sufficient that most people know a stew when they see one, whether
they can define it with clarity and precision or not.
Traditionally, stews are humble dishes cooked by humble people - an example of
peasant food at its best - and every culture on Earth has several types of stews
that are considered unique to their locale. They don't require precise measuring
or sophisticated techniques to cook, and just about anything that will fit in
the pot is acceptable.
The French took a simple beef stew and elevated it to haute cuisine with this
classic dish.
Boeuf Bourguignon
1/4 cup (60 ml) all-purpose flour
Salt and freshly ground pepper to taste
2 lbs (900 g) beef rump steak, cut into 1-inch (3 cm) cubes
4 oz (100 g) salt pork or bacon, cut into thin strips
1 shallot, chopped
2 onions, sliced
1/4 cup (60 ml) Cognac (optional)
2 cups (500 ml) Burgundy or other red wine
1 cup (250 ml) beef stock
1 bay (laurel) leaf
1 sprig fresh thyme
1 clove garlic, crushed
12 small onions, whole
12 mushroom caps, whole
2 Tbs (30 ml) butter
Season the flour with salt and pepper and toss the beef cubes in the mixture to
coat evenly. Shake off the excess flour. Fry the salt pork in a large heavy pot
over moderate heat until lightly browned. Add the beef cubes, shallot, and
onions and cook until the beef is lightly browned on all sides. Add the optional
Cognac and cook for 2 minutes. Add the wine, beef stock, bay leaf, thyme, and
garlic. Reduce the heat and simmer covered for 2 to 3 hours. In a separate pot,
saute the onions and mushroom caps in the butter until lightly browned and add
them to the pot 20 minutes before serving. Adjust the seasoning with salt and
pepper. Serves 4 to 6.
Bigos is popular year-round in Poland and Lithuania, and is
traditionally served on Boxing Day, the day after Christmas. I have seen recipes
that require several days of preparation and call for as many as 10 different
kinds of meat. Since I assume that woodcock, plover, and thrush may be difficult
to obtain in your area, I present this much simplified version. The quantity is
large, but part of the mystique of this dish is that leftovers improve in flavor
in the refrigerator. Some cooks insist that it reaches its peak of flavor on the
sixth or seventh day.
Bigos (Polish Hunter's Stew)
3 lb (1.5 Kg) sauerkraut
2 lb (1 Kg) pork roast or pork ribs
2 bay leaves
1 oz (25 g) dried mushrooms, chopped
20 black peppercorns
10 allspice berries
Salt to taste
12 cups (3 L) canned or fresh beef stock
2 lb (1 Kg) cabbage, chopped
2 Tbs (30 ml) butter
1 lb (500 g) smoked Polish sausage (kielbasa), cut
into 1/2 inch (1 cm) dice
1 lb (500 g) slab bacon, cut into 1/2 inch (1 cm) dice
Rinse the sauerkraut with cold water and drain well. In a large stockpot,
combine sauerkraut, pork roast or pork ribs, bay leaves, mushrooms, peppercorns,
allspice, and salt. Add 6 cups (1.5 L) broth and simmer over low heat for 1 to 2
hours, until the meat is tender. Remove the meat and allow to cool. Place the
cabbage in a large saucepan and add the remaining 6 cups (1.5 L) broth. Bring to
a boil and cook uncovered over moderate heat for 1 hour, until the cabbage is
tender. Add the cabbage and its cooking liquid to the sauerkraut mixture. Remove
any bones from the cooked meat and cut into 1/2 inch (1 cm) cubes. Melt the
butter in a large skillet and add the cooked meat and smoked sausage. Saute over
medium heat 10 minutes, until browned. Add to the sauerkraut mixture. In the
same skillet, saute the bacon over medium heat until crisp and drain on paper
towels. Add to the sauerkraut mixture. Cover and simmer for 1 hour or longer.
Makes 12 to 14 servings.
Return to the
Index of Recipes.
Baked
Goods
Apple Pie
The quintessential all-American dessert is apple pie, although
the dish didn't originate here but was brought by early British settlers. I
remember when every roadside diner in the country offered a slice of cheddar
cheese with apple pie, and maybe some still do. The more ubiquitous "a la mode"
version places a scoop of vanilla ice cream on top. Both ways are good, and both
are as American as... well, you know.
Apple Pie
5 to 6 cups (1.25 to 1.5 L) apples, peeled, cored, and thinly sliced
1/2 cup (125 ml) sugar, or to taste
2 Tbs (30 ml) lemon juice
1/2 tsp (2 ml) cinnamon
1/4 tsp (1 ml) nutmeg
1/4 tsp (1 ml) salt
2 Tbs (30 ml) butter
2 9 inch (22 cm) pastry pie shells
1 Tbs (15 ml) sugar mixed with
1/2 tsp (2 ml) cinnamon
Combine the apples, sugar, lemon juice, cinnamon, nutmeg, and salt in a mixing
bowl and toss to coat the apple slices. Line a pie plate with one of the pastry
shells and transfer the apples to the shell. Dot the apples with the butter.
Moisten the edge of the pastry and place the second pastry shell on top. Trim
and crimp the edge, and make several slits in the top with a sharp knife.
Sprinkle the sugar and cinnamon mixture over the top. Bake in a preheated 450F
(230C) oven for 10 minutes, then reduce the heat to 350F (180C) and bake for an
additional 25 to 40 minutes, depending on the type of apples used. The pie is
done when the apples are tender and the crust is golden brown. Serve warm, cold,
or at room temperature. Makes one 9-inch (22 cm) pie.
Return to the
Index of Recipes.
Biscuits
Quick breads, defined by Wikipedia as "a type of bread which is
leavened with leavening agents other than yeast," is a broad category of foods
that includes muffins, cakes, pancakes, waffles, banana bread, brownies,
cookies, and soda bread. We will be dealing with most of these individually in
50 Fundamental Foods, and today we begin with what Americans call biscuits and
most of the rest of the world knows as scones.
The main advantage of all types of quick breads, as one might surmise from their
collective name, is that there is no need to wait for several hours while yeast
does what baking soda and other chemical leaveners can do in a matter of
minutes. Nor do these yeast-free baked goods need to wait for gluten to develop
from the proteins in wheat flour. On the contrary, the baker of quick breads
needs to take measures to avoid the formation of gluten so that the finished
goods are tender and light. Keep in mind that the primary difference between a
fluffy biscuit and a chewy dinner roll is the amount of gluten formed in their
manufacture.
Probably the most important thing to remember when making quick breads of any
type is to work the dough as little as possible. Adding the wet ingredients to
the dry ingredients (butter counts as a dry ingredient when making biscuits)
just before forming the biscuits helps to limit the production of gluten, and
stirring and kneading the dough as little as possible is absolutely essential.
In fact, it's even okay if there are some specks of unincorporated flour in the
final dough - that's a good indicator that you haven't over worked it.
The following recipe is very close to the old-fashioned biscuits that most of
our grandmothers used to make without measuring, but by adding ingredients
"until the dough feels right."
Baking Powder Biscuits
2 cups (500 ml) all-purpose or cake flour
4 tsp (20 ml) baking powder
1 tsp (5 ml) salt
4 Tbs (60 ml) cold butter
1 cup (250 ml) milk or heavy cream, chilled
Combine the flour, baking powder, and salt in a mixing bowl. Cut the butter into
small pieces with a pastry blender, a pair of forks, or by pulsing in a food
processor. Pour the milk into the center of the bowl, stirring with a wooden
spoon just until the dough comes together. Roll into a 3/4-inch (2 cm) thick
circular shape on a lightly floured surface, being careful not to work the dough
too much. Add a little more flour if necessary, but the dough should be slightly
sticky. Cut out biscuits with 2-inch (5 cm) biscuit cutter by pressing cutter
into the dough and then lifting it straight out - twisting the cutter will
release air in the dough causing the biscuits to turn out flat. Reshape the
remaining dough and cut again. Place biscuits on an ungreased baking sheet
leaving 1/2" (1 cm) space between them. Bake in a preheated 450F (230C) about 8
minutes, until golden brown. Serve immediately for best results. Makes about 12
biscuits.
Return to the
Index of Recipes.
Chocolate Cake
You didn't think I would publish a list of 50 Fundamental Foods
without including chocolate cake, did you? I should hope not.
Chocolate cakes with creamy centers are all the rage today, and more than one
young chef has earned a reputation with this supposedly innovative approach.
However, Julia Child published this recipe for a chocolate cake with a
custard-like center forty years ago, once again demonstrating the timeless
quality of her kitchen wisdom.
Queen of Sheba Chocolate Cake
For the cake:
4 oz (4 squares, 100 g) semi-sweet chocolate
2 Tbs (30 ml) rum or coffee
1/4 lb (100 g) butter at room temperature
2/3 cup (160 ml) plus 1 Tbs (15 ml) sugar
3 egg, separated
1/3 cup (80 ml) finely ground almonds
1/4 tsp (1 ml) almond extract
1/2 cup (125 ml) cake flour, measured then sifted
For the icing:
2 oz (2 squares, 50 g) semi-sweet chocolate
2 Tbs (30 ml) rum or coffee
6 Tbs (90 ml) butter at room temperature
Whole almonds for garnish
Melt the chocolate and rum or coffee in a pot set over simmering water, stirring
to combine. Cream the butter and 2/3 cup (160 ml) sugar together until pale
yellow and fluffy. Beat in the egg yolks. In a separate bowl beat the egg whites
and 1 tablespoon (15 ml) sugar until stiff. Combine the chocolate mixture,
butter mixture, ground almonds, almond extract, and blend thoroughly. Fold 1/4
of the egg whites into the chocolate mixture, followed by 1/4 of the sifted
flour. Repeat until all the egg whites and flour have been incorporated. Pour
the batter into a greased and floured 8-inch (20 cm) round cake pan, pushing the
batter to the edges of the pan with a spatula. Bake in the center of a preheated
350F (180C) oven for about 25 minutes. When done, the cake will have puffed
up, the outer edges of the cake should be firm, and the center should move
slightly when the pan is shaken. A toothpick inserted in the outer portion
should come out clean, and slightly oily when inserted in the center. Allow the
cake to cool in the pan for 10 minutes. Run the blade of a knife around the
inside of the pan and invert the cake onto a cooling rack. Allow to cool
completely before icing.
To prepare the icing, melt the chocolate and rum or coffee in a pot set over
simmering water, stirring to combine. Remove from the heat and beat in the
butter 1 tablespoon (15 ml) at a time. Place the pot in a large bowl filled with
ice water and continue beating until the mixture has cooled to spreading
consistency. Spread the icing over the cake with a knife or spatula and decorate
with whole almonds. Makes 1 cake to serve 6 to 8.
Here is a chocolate cake with the spicy flavors of Mexico.
Red Chile and Cinnamon Chocolate Cake
1 cup (250 ml) heavy cream
4 Tbs (60 ml) butter
10 oz (280 g) high-quality bittersweet chocolate bits
1+1/2 tsp (8 ml) ground cinnamon
1 tsp (5 ml) mild red chili powder
5 eggs
1/3 cup (80 ml) sugar
1 tsp (5 ml) vanilla
In a medium saucepan bring the cream and butter to a boil. Remove from the heat
and stir in the chocolate, cinnamon, and chili powder, stirring until the
chocolate is completely melted. Place the eggs, sugar, and vanilla in a small
bowl set over a large pot full of simmering water, and whip until the egg
mixture is warm to the touch. Remove from the warm water bath and whip until
tripled in volume. Whisk one fourth of the egg mixture into the chocolate
mixture until well blended. Gently fold in the remaining egg mixture until well
blended. Pour the batter into a greased and floured 8 inch (20 cm) square cake
pan. Bake in the center of a preheated 350F (180C) oven for 50 minutes, or until
a toothpick inserted in the center comes out clean. Serves 6 to 8.
Return to the
Index of Recipes.
Choux Pastry
Choux pastry, also commonly referred to as cream puff pastry, is
among my 50 Fundamental Foods for the simple reason that it is one of the most
dramatic examples of the miracle of kitchen chemistry. With only five common
ingredients that are somehow combined in such a manner that they expand in size
by about three times when cooked, leaving a crisp outer shell with a hollow
interior, I still don't understand exactly how they work. The fact that they can
be stuffed with fillings savory or sweet indicates their versatility, an added
benefit.
Choux Pastry
1 cup (250 ml) water
8 Tbs (1 stick, 110 g) unsalted butter
A pinch of salt
1 cup (250 ml) all-purpose flour
4 eggs
Combine the water, butter, and salt in a saucepan and bring to a boil over
moderate heat. Add the flour and cook, stirring constantly, until the dough
forms a ball, about 5 minutes. Add the eggs one at a time, beating vigorously
until each one is completely incorporated before adding the next. (This takes a
bit of elbow grease - an electric mixer helps.) Bake immediately, or refrigerate
covered for up to two days. Makes enough for about 36-48 small cream puffs, or
24 large ones.
This is a basic recipe for cream puffs which can be made larger
or smaller, according to their intended use. Small cream puffs make elegant
finger food, and larger ones can be served as a first course or side dish. Both
can be filled with sweet or savory preparations. For sweet cream puffs consider
stuffing them with sweetened whipped cream, pastry cream, or ice cream. Savory
cream puffs can be filled with any creamed vegetable, chicken or tuna salad, or
just about any meat or seafood stew.
Cream Puffs
1 recipe choux pastry (see above)
About 2 cups (500 ml) sweet or savory filling of your choice
Make mounds about 1 inch (2.5 cm) in diameter, using a pastry bag or pair of
spoons, on a lightly greased baking sheet. Bake in a preheated 400F (200C) oven
until puffed and golden brown, about 40 minutes. They should produce a hollow
sound when tapped. Pierce each a couple of times with a skewer to allow steam to
escape, and cool on a wire rack. They may be filled by piercing with the tip of
a pastry bag, or by slicing a cap off the top. Makes 24 to 48, depending on
size.
Return to the
Index of Recipes.
Fruit Cobblers
No one is sure why this category of dishes is called "cobbler,"
but one theory suggests that they are "cobbled" together from whatever
ingredients are on hand, and this is the reason I have included fruit cobblers
in my list of 50 Fundamental Foods.
The ability to use virtually any fresh fruit in season (or preserved fruit that
the frugal housewife of yore had put up), and to top it with a large variety of
different toppings makes fruit cobblers one of the most variable and versatile
dishes you'll find anywhere. Evidence of this variability is found in the
various names the fruit-with-topping combinations have gone by around the United
States. Depending on where you live (and often the type of fruit and/or topping
involved), you may know these as cobblers, grunts, crisps, buckles, slumps,
crumbles, pan dowdies, brown Bettys, or sonkers. The one thing that most people
agree on regarding all these various aliases is that they are all distinguished
from pies by the absence of a bottom crust.
While there is no official rule that the filling has to be sweet, calling
anything with a savory filling by any of the names I listed is likely to lead to
a disagreement anywhere in the U.S., although this isn't the case in the UK and
Commonwealth where meat-filled cobblers are popular. As for the toppings, they
can range from a simple mixture of bread crumbs and butter to more refined
versions that may use pie dough, streusel mixture, biscuit (scone) dough, or
yellow cake batter as the upper layer.
This version can actually be made with just about any fruit - fresh, canned, or
frozen. Any berry does well, as do peaches, nectarines, and cherries. If you use
canned or frozen fruit make sure that they are completely thawed and/or well
drained.
Blackberry Cobbler
2 cups (500 ml) fresh or frozen blackberries
1 cup (250 ml) all-purpose flour
2 tsp (10 ml) double-acting baking powder
1 cup (250 ml) sugar
2 eggs
3/4 (180 ml) cup milk
1 tsp (5 ml) vanilla extract
1 tsp (5 ml) grated lemon rind
Whipped cream or vanilla ice cream (optional)
Wash and dry the berries if using fresh, or thaw, drain and dry the frozen
berries. Place in the bottom of a 2 quart (2 L) ovenproof casserole or soufflé
dish. Sift the flour and baking powder into a large mixing bowl. Add the sugar,
eggs, milk, vanilla, and lemon rind. Mix with a wooden spoon until thoroughly
combined. Pour the batter over the berries and bake in the center of a 350F
(180C) oven for one hour, until the top is browned. Remove from oven and let
cool at least 15 minutes before serving. Top individual portions with whipped
cream or vanilla ice cream if desired. Serves 4 to 6.
Return to the
Index of Recipes.
Pound Cake
A good old-fashioned pound cake is something that every serious
cook needs to know how to cook. Not just because it's one of the greatest cakes
in the whole world, but also because it's a versatile and flexible item. It can
be sliced and toasted like bread, or it can serve as a base for other sweet
items such as fresh fruit (think strawberry shortcake) or ice cream. And what
would an English trifle be without pound cake?
Pound cakes got their name from the fact that they are traditionally made with 1
pound each of butter, sugar, eggs, and flour, and even though many modern
versions have modified those amounts, they still roughly describe most of the
variations that are found all over the world.
The recipe below is truly a vintage recipe, one that I adapted from The Original
Fannie Farmer 1896 Cook Book, and it makes a very large cake. You can bake it in
a single large cake or Bundt pan, or you can divide the batter between two
regular loaf pans. Alternately, the recipe is easily halved.
Classic Pound Cake
1 lb (450 g) butter
1 lb (450 g, 2 cups) sugar
10 eggs
1 lb (450 g, 4 cups) flour
1/2 tsp (2 ml) mace
2 Tbs (30 ml) brandy (optional)
Cream the butter and the sugar together. Add the eggs and beat well. Add the
flour, mace, and optional brandy and beat vigorously for 5 minutes. Pour into a
deep cake pan, tube pan, or two loaf pans, and bake in a preheated 325F (160C)
oven for 60 to 75 minutes, until a toothpick inserted in the center comes out
clean. Makes 1 large cake or 2 smaller cakes.
Return to the
Index of Recipes.
Shortcrust Pastry (Pie Dough)
I debated long and hard over whether I would include a flaky pie
crust among my 50 Fundamental Foods. On the one hand, it is a classic recipe
that can be used for a myriad of dishes, both sweet and savory. On the other
hand, pretty good pie dough can be bought pretty much everywhere nowadays, so
why bother making it? In the end I decided to include it because it is a simple
yet tricky thing to make, and many bakers have earned widespread reputations on
the flakiness of their pie crusts.
There has been much discussion over the years as to the fat that
should be used. Many traditionalists insist on nothing but lard, while others
insist on nothing but butter. Some even prefer a combination of the two. The
pro-lard contingent maintains that it provides a crisper, flakier crust, and the
butter brigade points to the improved flavor of their version. You can
experiment with your own formula, but I'm going with an all-butter version.
The recipe below uses an electric food processor to cut the
butter into the flour mixture. If you prefer to do it by hand, cut the butter
into small pieces and rub them with the flour between your fingertips, dropping
them back into the mixture. Repeat until the flour and butter mixture resembles
coarse cornmeal. If the butter softens and begins to feel greasy, refrigerate it
for 15 to 30 minutes before proceeding. Alternately, you can use a pair of
knives, a fork, or a pastry blender to accomplish the same thing.
This recipe produces enough dough for a single-crust pie. If you
are making a double-crust pie, simply double the recipe.
Shortcrust Pastry
1 cup (250 ml) plus 2 Tbs (30 ml) all-purpose flour, plus
additional for dusting
8 Tbs (1 stick, 110 g) cold unsalted butter cut into about 8 pieces
1 tsp (5 ml) sugar (omit if making a crust for a savory pie)
1/2 tsp (2 ml) salt
Have about 1/2 cup (125 ml) ice water ready
Combine the flour, butter, sugar, and salt in an electric food
processor and process until the pieces of butter are blended and the mixture
looks like coarse cornmeal. Transfer to a mixing bowl and sprinkle with 3 Tbs
(45 ml) ice water. Stir with a wooden spoon, adding ice water 1 tsp (5 ml) at a
time if needed, until the dough forms a ball. Form into a ball, wrap in plastic
wrap, and refrigerate for 30 minutes. (The dough may be refrigerated for several
days, or frozen almost indefinitely at this point.)
Sprinkle a work surface with some flour and roll the dough into a
circle about 10 inches (25 cm) in diameter. Lift and rotate the dough frequently
as you do this, sprinkling with a little more flour each time until it no longer
sticks to the rolling pin or work surface.
Transfer the dough to the pie plate by draping it over the
rolling pin, or by gently folding it in half twice to form a wedge. Press the
dough firmly into the bottom and sides of the pie plate and trim the edge with a
small knife. Decorate the edge by pinching it with your fingers or pressing it
with the tines of a fork, and prick the dough all over with a fork immediately
before baking. Makes 1 crust for and 8- to 9-inch (20-23 cm) pie.
Follow this procedure whenever you are making a pie that calls
for a prebaked crust.
Prebaked Pie Crust
1 recipe Shortcrust Pastry (above) or prepared pie dough
Place the pastry dough in the pie crust and prick it all over
with the tines of a fork. Top with a piece of wax paper, parchment, or aluminum
foil large enough to cover the entire pie and fill with dried beans, rice, or
pie weights. (The beans and rice can later be reused for the same purpose.) Bake
in a preheated 425F (220C) oven for 12 minutes. Remove from the oven and reduce
the temperature to 350F (180C). Carefully remove the wax paper and weights and
bake until the crust is golden brown, 10 to 15 minutes. Remove from the oven and
cool on a wire rack. Makes one 8- to 9-inch (20-23 cm) pre-baked pie crust.
Return to the
Index of Recipes.
Yeast Bread
Scores of volumes have been written on the subject of bread, and
I'm not going to try to offer a comprehensive survey of the world's yeast breads
in this space. Suffice to say that bread has been the staple starch of Western
cultures for tens of thousands of years, and that should be enough to earn it a
place on anyone's list of fundamental foods.
With people all over the world making yeast breads for millennia, the variations
are too numerous to even imagine. Since the only requirements are a flour of
some sort, and some sort of liquid, and wild yeast that find their way into the
mixture out of thin air (literally), it is quite possible that no two loaves of
yeast bread ever made have been identical. This fickleness continues to
frustrate and inspire bakers even in today's mechanized bakeries, and anyone who
can produce a truly superior loaf of bread is worthy of society's highest
honors.
This recipe comes from my mother's files and is written in a hand she doesn't
recognize, so I can't tell you where the recipe originally came from. I can tell
you that my family has enjoyed it for decades.
Tomato Herb Bread
1 package (about 1 Tbs, 15 ml) active dry yeast
1/4 cup (60 ml) warm water
1 1/2 cups (375 ml) milk
3 Tbs (45 ml) butter
2 tsp (10 ml) salt
2 Tbs (30 ml) sugar
6-7 cups (1.5-1.75 L) unsifted all-purpose flour
2 eggs, beaten
1 large tomato, peeled, seeded, and chopped
1 Tbs (15 ml) dried onion flakes
1 tsp (5 ml) dried basil
1/2 tsp (2 ml) dried marjoram
1/2 tsp (2 ml) dried thyme
Combine the yeast and water in a small bowl and allow to rest at room
temperature until foamy, about 15 minutes. Combine the milk and butter in a
small saucepan and heat over a low flame just until the butter starts to melt.
Place the salt, sugar, and 2 cups (500 ml) of the flour in a large mixing bowl.
Add the yeast mixture and the milk mixture and beat until incorporated. Add the
eggs, tomato, onion, and herbs and beat to incorporate. Add the remaining flour
1/2 cup (125 ml) at a time, beating constantly, until the dough becomes stiff
and begins to pull away from the sides of the bowl. Turn onto a floured surface
and knead, adding as little flour as possible, until the dough is smooth, about
10 minutes. Place in a greased bowl, cover, and allow to rise in a warm place
until doubled in volume, about 90 minutes. Punch the dough down and knead
slightly on a floured surface. Divide into two equal pieces and place in lightly
greased loaf pans. Bake in a preheated 350F (180C) oven until browned on top, 35
to 40 minutes. Remove from the pans and cool on a wire rack before slicing.
Makes 2 loaves.
Pita bread (also known as pocket bread) is ideal for sandwiches,
and it makes a wonderful all-purpose bread as well. Whole wheat flour may be
substituted for up to half of the white flour in this recipe.
Pita Bread
3 1/2 cups (875 ml) all-purpose flour
1 cup (350 ml) water
1 Tbs (15 ml) olive oil
2 tsp (10 ml) salt
1 1/2 tsp (7 ml) instant yeast
Combine all ingredients in an electric food processor or mixing bowl and mix,
adding a little more water or flour if necessary to form a firm, slightly sticky
ball. Turn onto a floured surface and knead for 1 minute. Place in a greased
bowl, cover loosely with a towel, and allow to rise until doubled in volume,
about 2 hours. Punch down the dough and divide into 6 to 12 pieces. Keep all
pieces lightly floured and covered. Flatten each piece of dough into a disk from
6 to 8 inches (15 - 20 cm) in diameter. Working in batches of 3 to 4, lightly
flour each disk and place on a baking stone (preferable) or baking sheet that
has been heated in a preheated 500F (260C) oven. Bake and remove from the oven
after they have puffed up, about 3 minutes. Some may not puff up, but will still
be fine. Makes 6 to 12 pitas.
Return to the
Index of Recipes.
|


 Joe
Barkson has been writing and publishing under the pen name "The
Chef at Worldwide Recipes" since 1998. He came to food writing
late in life following checkered careers in computer marketing,
graphic design, and teaching high school Spanish. A lifelong
interest in food and cooking ("I've been eating since I was a
baby," he is fond of saying) was nurtured by extensive
international travel during his formative years, and this
accounts for the emphasis on world cuisine in his choice of
recipes and themes. Twice married and currently happily single,
he lives in rural Georgia with a hyperkinetic schipperke that
answers to Cooky when the mood strikes him.
Joe
Barkson has been writing and publishing under the pen name "The
Chef at Worldwide Recipes" since 1998. He came to food writing
late in life following checkered careers in computer marketing,
graphic design, and teaching high school Spanish. A lifelong
interest in food and cooking ("I've been eating since I was a
baby," he is fond of saying) was nurtured by extensive
international travel during his formative years, and this
accounts for the emphasis on world cuisine in his choice of
recipes and themes. Twice married and currently happily single,
he lives in rural Georgia with a hyperkinetic schipperke that
answers to Cooky when the mood strikes him.